Fixing A Broken Pipes

Cast Iron Pipes: What You Can Expect in Older Houses

Shortly after I purchased my first home here in, I was pretty naive as to what owning an older home can mean and what to expect. I planned and budgeted oh so carefully for the items my inspector had red-flagged and all the small cosmetic renovations I planned on making. After only two weeks into the renovation process, I received a phone call from the electrician I had hired. “Did you know you have mushrooms growing under your house?” he said. Turns out, I had a leak in the main sewer line which had contaminated the dirt under the house in the crawl space. After running through my inspection papers with a fine-toothed comb, I verified that there was no mention of any plumbing red flags and that plumbing isn’t typically covered in a home inspection beyond running faucets and flushing toilets. In hindsight, I should have done my homework on what to expect from the old pipes found in these beautiful, vintage homes.

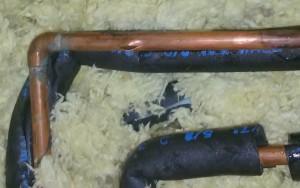
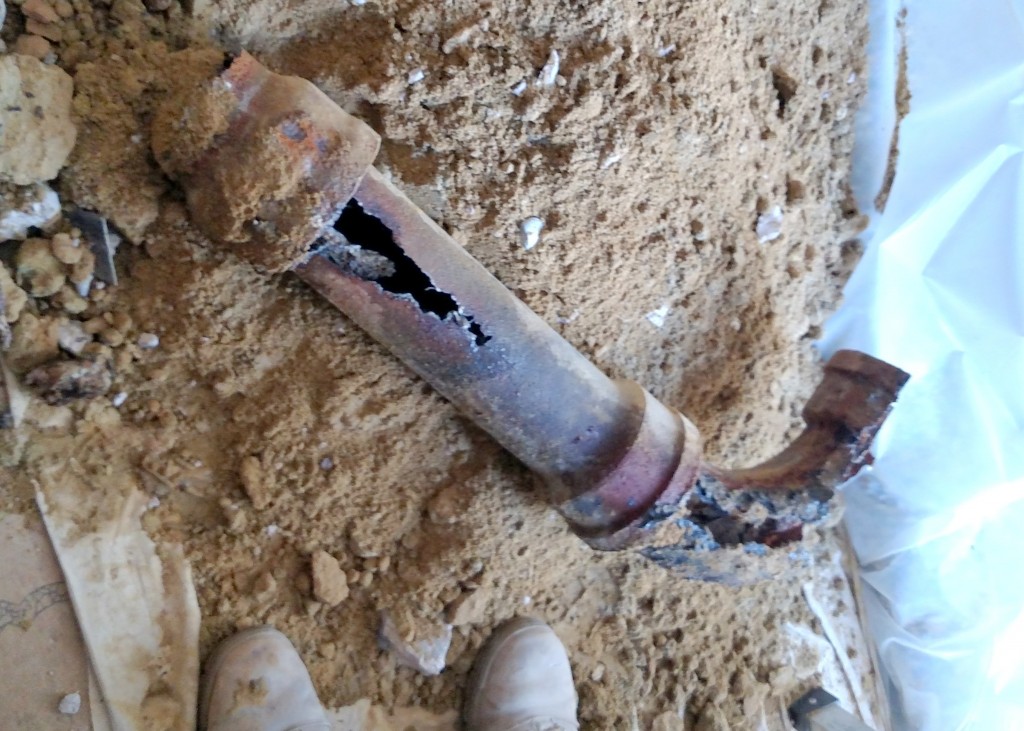
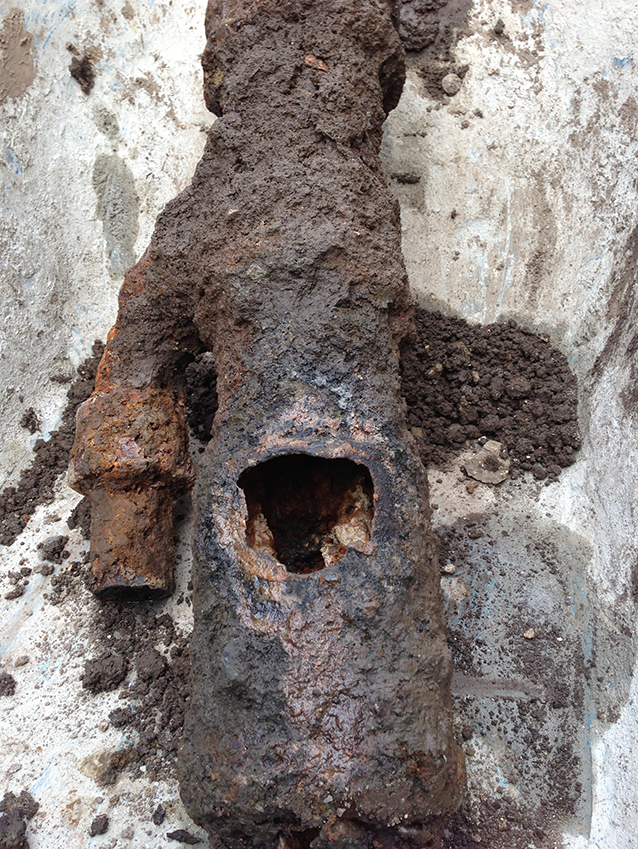
One of the most common problems is the aging cast iron pipe that was used in construction until about 1980, when PVC was introduced to residential building. According to a 2012 Water Infrastructure and Sustainability fact sheet by the Environmental Protection Agency (EPA), the average age of a broken water main in the U.S. is 47 years. Unfortunately for us, this means most of our homes’ pipes are on the tail end of their life expectancy. This especially affects the main sewer line and pipes coming from your bathrooms and kitchens. These pipes are subject to a much faster corrosive process than the pipes carrying just drinking water, which is what is used to fill bathtubs and sinks.

How old are your pipes?”

Let’s face it, our pipes are old. It’s likely your pipes are original and thus as old as the year your house was built. If you’re unsure, find out when your house was built and if there have been any plumbing replacements or repairs since you moved in.“ Knowing the age of your pipes will help you to assess their need for repair.”

Do you have mature trees near your water service lines?”

One of the many draws to the old neighborhoods of Vegas is the mature trees and established landscaping that provide shade from the hot sun. These roots systems, however, may have spread into the plumbing lines beneath our houses. If you do have mature trees and plants located close to your house, do some quick research on their root systems and determine if your pipes have been endangered.

Do you have clay soil?”

The most common types of soil in Las Vegas are clay, sand and hard rock caliche. “According to NACE International, the world’s leading professional organization for the corrosion control industry, sandy soils are among the least corrosive, and clay soils are among the most severely corrosive.” There’s nothing we can do about this one, folks. Look for warning signs mentioned below and plan ahead.

Preventative Maintenance Tips for Your Plumbing

What do you do when you have faucet leaks, broken pipes, clogged toilets, and water heater running cold?  Wouldn’t you prefer to avoid these plumbing problems?  Understanding the problems and performing preventative maintenance can help you avoid plumbing problems.  The first step for preventative maintenance involves understanding everything that is included in your water system.  These are everything that uses water in your home, such as the sinks in your bathroom, kitchen and laundry/utility room, your appliances such as the refrigerator, garbage disposal and washing machine, toilets, showers, and your water heater.  All of these can be maintained to prevent plumbing problems from getting out of hand.

Here are some preventative maintenance tips you can use:

Fix leaking faucets and showerheads.  Dripping faucets can waste a lot of water and that can add to your bill.  And if you don’t fix a dripping faucet or showerhead, the drip can get worse over time.  Those problems can cause water damage.  To prevent problems, check your facets regularly for leaks and make repairs as needed.  Check the handles to make sure no water drips when the handles are turned to the off position and check underneath the sinks for water stains or drips when the water is running.

Unclog slow drains.  When the water is slow to drain there may be a problem.  Before it gets out of hand, use a homemade mixture of vinegar and hot water to flush down the drain and unclog any debris.  This preventative maintenance tip can be done every few months and will get the drain flowing again.

Check all exposed pipes and appliances for water leaks. Your disposal, refrigerator, or water heater can be the source of a leak.  Look at any manufacturer’s requirements for maintaining your appliances.  Watch for visible signs of a leak such as water stains on walls and ceilings, or puddles of water.  Also be wary of mildew.  Installing a drip tray underneath your water heater and washing machine can help limit damage if a leak were to occur.

Fix leaking toilets.  Sometimes a faulty seal around the valve seat can cause your toilet to run even when it is not flushed. Over time, gunk will form around the valve seat and flapper. This gunk will prevent the flapper to seal properly, which will cause the water to continue to run.  Another problem could be with the handle or tank stopper.  The repair that is needed is often quick and inexpensive maintenance.

Be careful what you flush or pour down the drain!  The problem with drains and toilets is that so many things can get flushed down them.  The easiest way to prevent problems with your pipes is to be careful what you flush or pour down them to begin with.  Don’t flush anything other than toilet paper and human waste down the toilet.  Don’t pour anything that can be reactive down the drain.

Check the water pressure.  Water pressure is how much force is coming out of your faucets and shower heads.  You can test the water pressure on your system with a pressure gauge to make sure it is at a safe level.  One other preventative measure is to add a pressure regulator to maintain your water pressure at a safe level.

Remove and clean your shower head of any sediment that may have accumulated.  This can improve the water pressure of your shower head.

Drain your water heater to remove sediment annually to semi-annually. Over time your water heater can get sediment in it and become less effective.

Look inside the burner chamber of your water heater. You shouldn’t see any flakes of rust inside of the chamber. And verify the flame of the water heater is a blue color with no signs of yellow in the flame. If you see a yellow color, this may mean that the jets need to be cleaned.

Check the hoses for signs of cracks, brittleness, or leaking. Replace your hoses as needed.

If you have a septic tank, you should have it regularly inspected.  Add pumping your septic tank to your list as an important part of maintenance.

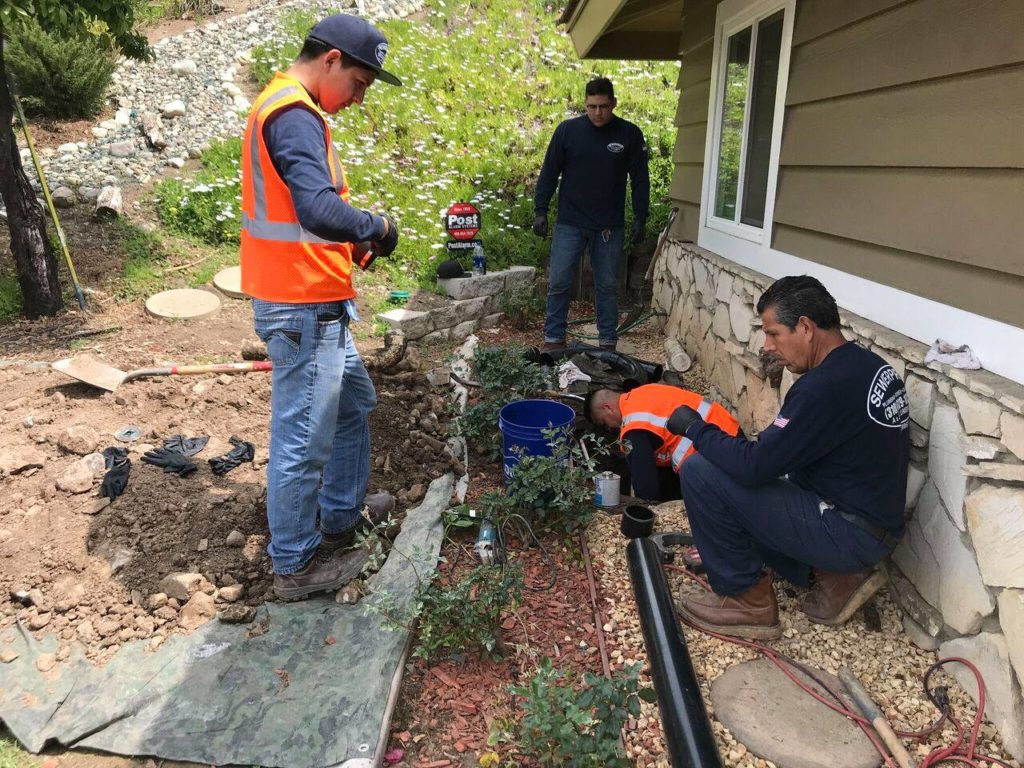
If you have a sewer system, it is good to understand how your lines run and inspect for tree roots that could potentially damage your sewer lines.  A preventative measure would be to have your sewer lines snaked periodically to avoid clogging.

Performing preventative maintenance for your plumbing can help you avoid a major plumbing problem.  Sometimes you may need a repair after checking items to keep them maintained.  Although some repairs can be do-it-yourself, others may require more expertise.

When Should I Consider Pipe Relining?

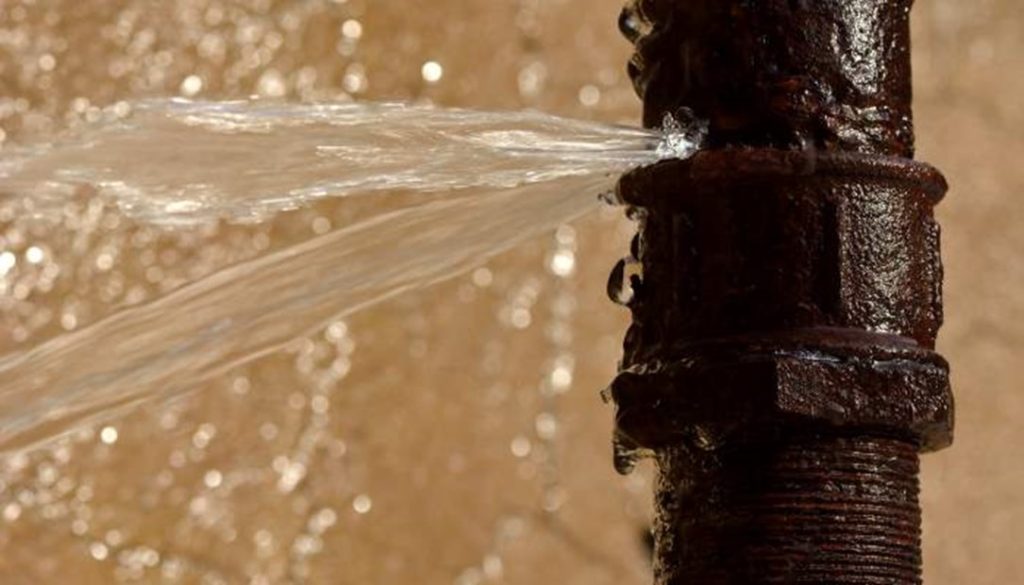
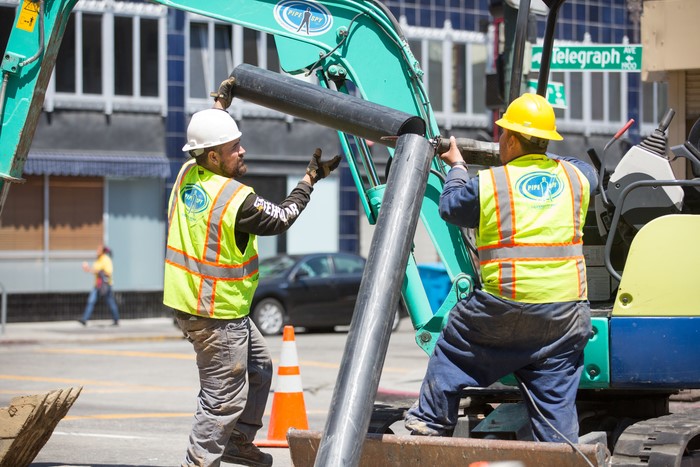
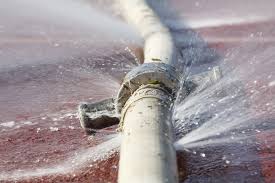
Perhaps the worst home maintenance project is repairing pipes. When you are having trouble with plumbing, your first instinct might be to replace the pipes. You are not wrong; replacing pipelines is a traditional way to remedy plumbing issues. This way, you will replace a faulty pipeline just like replacing faulty light bulbs. But, unlike replacing light bulbs, replacing damaged pipes is an expensive and burdensome process. It’s a good thing that there is a better way to repair damaged pipes, an easier and cheaper way to repair, and that is pipe relining.

Are broken pipes a persistent problem in your property?

Damaged pipes are a quite common home problem that need immediate attention. This is where pipe relining comes in. From small, persistent leaks, to instant pipe bursts, there are many instances when pipe relining will be useful. Below is a list of common pipe problems. If you experienced any of these, it might be time to consider pipe relining.

· Burst pipes

It is only natural for solid and oily materials to be a part of your waste. However, they can increase the pressure of your entire plumbing when left unmaintained. This increase in pressure expands the pipes until they burst. To help you monitor your pipes, call your trusted Newcastle plumber the moment you suspect a clogged drainage.

· Changes in temperature

Taking a cold shower in an extremely hot day may be satisfying, but not for your plumbing. Sudden extreme changes in temperatures such as running cold water along your warm pipelines can damage your plumbing. The rapid expansion and contraction of the pipes causes them to break easily.

· Root intrusions

Pipelines naturally attract roots. They are an abundant source of water and nutrients for the plants. So when there is a leak, roots seep into the pipe and can clog your plumbing. Repairing these damaged pipes can be costly. It also involves the process of unblocking and making sure that the roots will not intrude after the repair.

· Deterioration and rust

Steel pipes are likely to rust. Being exposed to moisture and other oxidating agents, this is practically inevitable. Rusting weakens the structural integrity of your pipes, which often leads to leakage. Likewise, the natural wear and tear of materials as they age over time helps degrade the quality of these materials. Not to mention that the harsh substances and elements that run through these pipes shortens their lifespan. A routine inspection, maintenance, and repair from your trusted plumbing service will save you from further trouble.

· Poor plumbing and maintenance

Seeking help from under-experienced or incompetent plumbers, or even fixing the plumbing on your own, can also lead to broken pipes. This may be because of a variety of reasons, such as an overlooked clog, or joints that are not screwed in well. Make sure that you hire competent and expert plumbers capable of maintaining your plumbing. In order to fix these common plumbing problems, we need to understand how they are damaged so that we can also try to prevent damage before they even happen. Moreover, leakage of waste water is harmful for your health. That is why we need a fast and immediate solution to these problems.

What is pipe relining?

Pipe relining is a relatively modern, non-invasive maintenance procedure to repair existing pipelines. After a thorough investigation of the site and the plumbing, the damage and obstructions along your pipeline will be identified. Then, these obstructions will be removed.

Broken Pipe Repair

A broken pipe always catches the homeowner or business owner off guard. There are many things that can cause a pipe to leak or burst, however one thing is always constant and that is the stress it will cause you when you notice water seeping from your ceiling, slab leak or puddling in your yard. At times you will not notice any excess water, rather a spike in your monthly water bill. This is always a good indication you have a leak somewhere that you need an Emergency Plumber to address.

Signs of a Broken Pipe:

Puddling Water

Damp Drywall

Low Water Pressure

Foul Odors

Banging Pipes

Spike in Monthly Water Bill

Gurgling Noise

Continuous Clogging

If any of these symptoms are occurring, your first step should be to turn off your main water valve

Common Plumbing Issues and How To Fix Them

Plumbing issues are often the most stressful. We can’t just ignore them, and in many cases, we can’t just fix them quickly and easily on their own.   But if you have a basic understanding of common issues (like plumbing backups, clogged sewers, a clogged drain line, or leaking pipes) then you can more effectively communicate with your plumber about the problem and have a better understanding of the kinds of repairs needed.

Slow-Draining Sink

This common problem strikes when we least expect it: we fill the sink, clean whatever needs cleaning, and the next thing you know, we have a sink full of filthy water that doesn’t seem to want to go anywhere. The reason this problem is more regular than others is that we don’t really pay attention to what we put down that drain. There are a few common items that can end up in a drain, depending on the location of the fixture.

logged Toilet

Much like the clogged sink, only worse. A toilet can clog under the best of circumstances, and usually under the worst conditions. A clogged toilet is a much more difficult beast to tackle than a clogged sink because all the drainage is either in or underneath the toilet itself. These clogs are usually caused by a combination of human and paper waste (unless something has been physically dropped in there).

Running Toilet

You know that sound your toilet makes after you flush it? That’s the sound of water filling back into the tank after use. You should only hear that sound right after you flush, and only for a few seconds. If your toilet continues to fill, or fills at regular intervals, then you run the risk of a massive water bill at the end of the month

Dripping or Running Faucets

When talking about dripping or running faucets, let’s break it up into different potential problems.

Brushed Nickel Kitchen Faucet

What to Look for When Searching for Your Next Kitchen Faucet

Your Kitchen is Your Command Center

Prepping for spaghetti night. Bathing the baby. Watering the plants. It should come as no surprise that you spend more active time in the kitchen than any other room in the house. And from selecting a finish to starting installation, there are plenty of things for you to consider when choosing your next kitchen faucet.

Think About What Goes on in Your Sink

When it comes to taking care of business in the kitchen, you need a faucet that’s built to handle everything you throw at it. Think about your everyday experiences and then see how the right combination of features — including handles, spout height, and sprayers — can help you create a space that works your way.

Hands-Free Convenience

Touchless Kitchen Faucets with MotionSense™ feature touchless activation, allowing you to easily turn water on and off with the wave of a hand.

Keep Everything in Reach

Whether you’re rinsing down the corners of your sink or cleaning fresh veggies from the garden, a faucet with the right sprayer helps make quick work of your kitchen tasks

Get Smart About Arcs

Have you ever shimmied a large pasta pot under a low spout or had your window view interrupted by a high spout? if so, then you understand how important it is to have a faucet that’s just the right height.

How to Choose the Perfect Kitchen Faucet for Your Kitchen?

Buying Considerations

Going head first into buying a kitchen faucet can be a costly venture for the unprepared. Beyond the pitfalls that could lead to you calling in a plumber, is getting it installed only to see it’s not really what you want. The kitchen faucet decision should be treated with care since you’re dropping so much on one item. Every kitchen has its own little theme so tailoring your wants and needs to a specific type is vital in the search, as what your neighbor has may be completely different than what you need. Below are some of the main considerations when looking for a kitchen faucet that you can use efficiently. After reading the 5 sections you should have a better overall idea of what it is that would work best in your kitchen, and you may even get some ideas for some of your friends. Don’t be afraid to spread the word or even do some Christmas shopping! There is always someone that could use a great kitchen faucet.

How to Install Faucet?

Take a good look at the area that you will be installing your new kitchen faucet into. Is there a faucet already there that needs to be replaced? Is this a completely new build that doesn’t have the hoses in place? And do you have a specific theme?

These are the questions you should be asking yourself when you want to purchase a kitchen faucet. And since not every brand is created equally, you’re going to need to decide on what install you want to do.

What Type of Sink Do You Have?

This may come as a surprise to some people, but there is a variety of kitchen sink types other than stainless steel. Stainless steel makes up the bulk of the industry and is clearly the leader. It is installed in more homes than all the other sink types combined, a statistic that won’t be changing anytime soon.

What Design Does Your Kitchen Sink Suit?

The design of a kitchen faucet will come into play when deciding if you are comfortable with the two lever or single lever system. As a reference, the two lever system is considered to be dying out, as the advantages of having it have been trimmed down to simply being able to use if one of the handles go out.

Our New Kitchen Faucet and 8 Easy Tips for Choosing the Right Faucet

It may seem like a strictly functional piece of hardware in your kitchen, but the truth is that your faucet is often a major focal point to the space. Usually sinks and stoves are the focal points in a kitchen. And a beautifully designed faucet not only complements a newly designed kitchen, but can also be the perfect finishing touch to a DIY-renovated-on-a-budget kitchen makeover as well.

Think about your the general style of your kitchen as well as the style of the sink that you have selected. Pairing a cast iron farmhouse sink with a super modern faucet may not work together unless you are going for a very edgy or eclectic look. Similarly, a strongly modern stainless sink would not suit a traditional bridge style faucet

Faucets generally come in three main finishes: chrome, nickel (or other brushed metal), or bronze. Consider the nearby cabinet hardware, as well as lighting and other metal finishes in the space. It doesn’t all have to match exactly, but choose a faucet whose finish works well with the other finishes in the space. Because I chose chrome and nickel finishes throughout the space in the cabinet hardware and lighting, I selected a chrome faucet to complement these finishes.

Faucets with a high arc are very on trend these days… but you need to consider the amount of space you have above your sink. If you have low cabinets or shelves above the sink, you may not wish the arc to be too high. Another thing to consider is the size of your sink…. a large sink may require you to select a faucet with a larger reach. The farmhouse sink that we selected is quite wide and deep, so choosing a faucet that had a spray option that would reach all the corners of the sink easily was critical.

A sprayer on a faucet is an amazing tool… a good sprayer can remove all kinds of gunk and mess for you, and it also can help to keep your sink cleaner. Often faucets with a separate side spray are not as convenient or effective as a sprayer that is built into the faucet itself. Some faucets, such as the one we chose, even have a little button on the faucet head to turn the spray on and off making this feature super convenient and easy to use.

How to Choose Your Kitchen Sink Faucet

As one of the most used features in your home, choosing the right kitchen faucet is not a decision to take lightly. This comprehensive guide gives you all the information you need to make a good choice. Find comprehensive tips on faucet mount, number of holes needed for installation, picking the right faucet style, finish, and features and how to measure for kitchen faucet size and reach. This guide also includes a comparison of pros and cons for kitchen faucet finishes.

Measuring For Kitchen Faucet Size and Reach

It’s important to check every aspect of the size of your faucet before you order. First, you need to address size as it relates to functionality. Second, to look balanced, your faucet should be in proportion to the sink. A large faucet would visually overpower a small prep sink, while a small faucet might look odd in a large sink and countertop area.

Height

You may find height expressed as deck to top of faucet and/or deck to aerator. Make certain you are choosing a faucet with adequate height to accommodate the items you’ll be washing or filling. The higher the spout, the easier it is to fit tall pots under it for filling or cleaning. If you have a shelf above your sink or a wide window ledge, a tall faucet may not fit.

Reach

This important (and often overlooked!) measurement refers to the horizontal distance from the faucet spout to its point of connection with the sink or countertop. In other words, how far the faucet extends into the sink. This measurement determines how large an arc your faucet can cover within the sink basin. This aspect of your faucet also needs to be coordinated with your sink size so the water stream does not hit too far back or forward within the basin.

Clearance to backsplash

Let’s say you fall in love with a faucet whose single handle controls temperature by rotating back. You bring it home and install it, and it looks fabulous. Then you turn it on…and find out that the handle hits your backsplash before it’s fully extended. Check the product specifications to see if there is a minimum recommended clearance to backsplash. Make sure the space between your backsplash and the handle allows for the recommended measurement, or select a faucet whose handle(s) have only forward motion to operate.

How to Buy a New Kitchen Faucet

Buying the right kitchen faucet depends largely on the existing plumbing. Choosing a new kitchen faucet can be easier than you think once you consider three important details before you begin shopping.

Start With the Sink’s Faucet Holes

There are many different kitchen faucet and sink designs available, but they’re not always compatible. Start by taking a look at your kitchen sink to determine how many pre-drilled faucet mounting holes are available. This applies if you’re installing a new faucet in an existing sink or buying a completely new faucet and sink.

The location of the sink mounting holes is another thing to keep in mind. Often, the faucet is located close to the center of the sink, but this is not always the case. If the faucet will be mounted on one side of the sink, the spout needs to be long enough to reach the opposite basin for it to be of use. A tall spout with a pull-down spray nozzle is another option for a sink with corner mounting holes

Where’s the Mount?

There are top-mount and bottom-mount faucets. Top-mount faucets attach from underneath the counter. The screws are screwed in through the bottom of the faucet. Bottom-mount faucets attach from the top of the counter. The screws are installed through the top of the faucet piece.

Check the Water Lines

Make sure the new kitchen faucet you want is compatible with the water supply lines. Look under your sink towards the bottom of the cabinet and note the size of the existing water line and the shutoff valves.

Key Benefits Of Residential Broken Pipes Inspection

Tips for Choosing the Best Contractor to Repair Broken Pipes

When upgrading a home, one of the things that you will be looking at is the drains. You want to ensure that after renovations, you have a properly functioning plumbing system

It all starts by choosing a plumber to work on your drainage pipes. Regardless of where you live, you are likely to find many contractors for this job. However, it is unlikely that they all will be suitable. You need to find out what they are capable of. For example, you may ask for some of the projects that they worked on and see if they reflect what you want. You also should talk to them about your unique needs so that they understand your project.

Latest Plumbing Technology

If you look at some of the leading plumbing companies in your area, you will notice that they have invested in the latest technology for broken pipes repair. Some of them use video inspection to find faults in pipes and fix them accordingly. This is the reason they are always fast and accurate in what they do. If you choose a company that still relies on ancient techniques, you will only end up a disappointed customer.

When looking for a contractor to repair broken pipes, you should insist on experience. During their work, plumbers acquire unique skills and therefore, they become better with time. At the end of the day, what you need is a home with the perfect drainage system

Entrust the repair of your broken pipes to the professional plumbers of this company. They are available 24/7, including holidays and weekends. They also offer water damage restoration services.

Burst pipes and water leaks

Water damage to your property is usually covered as a standard feature in your buildings insurance policy.  Often referred to as ‘escape of water’ by insurers, it can be caused by several issues, from burst pipes due to freezing temperatures, to a leaking dishwasher or an overflowing blocked toilet.

Stopcocks – know where these are and make sure that you test them regularly as they often seize up. If there is an escape of water / water leak in your home, turning off the stop cock asap can help to limit the level of damage caused.

Consider fitting a leak detection device which will monitor your usual water use and turn off the water if it suspects a leak. Use a plumber or a professional to install these types of devices. Some insurers may offer help with the installation of a leak detection device and may also take this into account when pricing your cover

Where possible, regularly check the pipes where your appliances are plumbed in for any looseness, leaks or drips. In areas where pipes are covered but that you still have access to (e.g. behind removable bath panels, toilet cistern panels and underneath kitchen units, where accessible,) it’s a good idea to take a look every now to make sure there aren’t any small leaks which could become major

Consider what you are putting down your drain, and make sure that you clean drains regularly if you suspect a blockage. Substances such as fats and oils from cooking, produce stickers, baby wipes, sanitary products and even hair can all cause clogs in drains and toilets

Guide to Sewer Pipes: Clay, Iron, Plastic, and Orangeburg

Few, if any, homeowners ever elect to dig up their yard to take a look at their sewer pipe. Pipe assessment is never an elective activity; it’s usually forced upon you when the toilets refuse to flush and wastewater comes up instead of going down.

Digging up and replacing your sewer pipe is that dreaded activity that destroys landscaping, costs a bundle, and accomplishes nothing other than letting you return to life as usual. Understanding what kind of sewer pipe you have helps to minimize the pain a bit since you will know whether you can continue with the same pipe or switch to a different pipe. Often, the type of sewer pipe running through your yard corresponds with the age of your house.

Older Homes

In older properties built before the 1950s, you might find clay pipe, cast-iron pipe, or a fiber conduit pipe called Orangeburg. Clay and cast-iron are older types of sewer piping and can remain in the ground as long as they are still moving waste with no leaks. Orangeburg sewer pipe is worth replacing if you have the ground opened up, even if the Orangeburg appears to be in good shape.

Newer Homes

Homes built from the 1970s onwards tend to have plastic sewer pipe. In some rare instances, you may find older cast-iron or clay sewer lines at a new house. The new house (and even some remodeled houses) will often have new pipe installed within the house envelope itself and extending a few feet into the yard. The yard area is where the old sewer pipe will start up again and continue all the way to the city sewer main.

Plastic: PVC and ABS

Plastic sewer pipe for underground installations is available in both ABS and PVC. Both types of pipe have smooth interiors for excellent carrying capacity of solid waste matter. The smooth exteriors also help resist root anchorage

How Much Does It Cost to Fix a Broken Water Pipe?

Average Costs of Typical Pipe Bursts

One of the main costs to consider when dealing with a broken pipe is water damage. Due to flooding and leaks in your walls, ceiling, floor, or basement, you can expect to pay anywhere from $5,000-$50,000. The average insurance claim for a broken pipe and water damage is about $15,000 and up if you have a broken water pipe in wall or floors. While the cost to repair leaking pipe in ceilings is comparable. Your homeowners insurance should cover a majority of the water damage costs, but may not pay to repair the broken pipe. Factors such as location, severity of the break, and level of internal damage can affect how much you will pay.

If the broken pipe is on a small fixture and is easily accessible, you may be able to fix it yourself. On average you can expect to pay anywhere from $10-$50 for a do-it-yourself kit to repair a simple leak. If there is not an excessive amount of water damage, and you choose to hire a plumber to repair your broken pipe, you can expect to pay anywhere from $50-$250. In the case of an emergency, the cost may go up to $300-$600. Again, there are other factors that can affect these prices, such as how much work is needed and the materials required for proper busted water pipe repair.

Estimated Price of Additional Costs

If the reason your pipe burst is due to frozen water, the area may need to be thawed in order to properly locate and repair the pipe. The process for doing this can cost you anywhere from $20-$500.

In the case that there is damage to a water line that has also compromised the electrical wiring in your home, you may need to hire an electrician to come make sure your circuits and wires are working properly so that there are no potential safety hazards. This can cost anywhere from $100-$1,000, depending on the severity of the issue.

If you choose to contract a plumbing company to help you repair your busted pipe, you’ll need to factor in installation fees and any additional costs of materials needed to get the job done

Common causes of leaky, cracked & broken pipes

Corrosion of the pipe

Corrosion weakens your pipes outer surface until it develops leaks. These leaks are difficult to detect and gone undetected can cause serious damage to your insulation, drywall and foundation

High water pressure

Increased pressure inside your pipes can cause leaking around the connections and valves. The rise in pressure can be related to problems with a hot water heater. Or the culprit may be hardness of your water. Hard water causes a mineral build-up along the inside of your pipes. This may be corrected by the installation of water softener.

Poor plumbing installation or repairs

If your pipes were not installed or repaired by professional plumbers, there is a chance that poor connections will eventually lead to leaks, cracks and breaks in your pipes.

Aging Pipes

As pipes age, they experience regular wear and tear. Over time, pipes rust, corrode, become weak and start to erode. Signs of aging water pipes include a poor water pressure, rusty discolored water, bad tasting water, small dark flakes in your water, problems running more than faucet at a time, complete loss of water flow, leaks or signs of corrosion. Replacement of effected pipe or complete re-piping is your solution.

Pipe leaks can be both the easiest and most difficult plumbing repairs to identify. If the pipe under your kitchen sink begins to leak or spray, you will notice it in your cabinet and on your floor. However, if a pipe inside your wall begins to leak, you may not notice it until it begins to cause serious damage. We believe that knowing why your pipes leak, crack or break may not only help prevent major damage to your home, but also help you understand why enlisting the help of a professional plumber is so important.

Facts About Trenchless Pipe Replace Bursting Technology

Trenchless Sewer Line Repair Vs (Traditional) Sewer Repair

Trenchless Sewer Repair

The trenchless method used at Pipe Spy (pipe bursting) usually involves digging two access pits on either side of the length of a project’s sewer line—one entry pit and one exit pit where the new pipe is pulled through the existing pipe using a bursting head, breaking the old clay or cast iron away and leaving the old pipe in the ground. What is left is the new, longer lasting pipeline.

Trenchless technology was created to be more cost-efficient; these processes take less time and can often (at most single-family private residences) be executed by crews of four or five persons. Because there is less digging on a trenchless worksite on the whole, there is less chance of disruption to property landscapes and other underground utilities, making it a safer option.

The trenchless method we use at Pipe Spy is more eco-friendly and leaves a smaller carbon footprint because in its execution we use less energy, less manpower, and fewer materials; we use HDPE lines that often last 25-50 years longer than the average materials used to replace sewers. These lines are also less susceptible to environmental damage like corrosion and tree roots.

Open Trench (Traditional) Sewer Repair

The traditional method or open trench method usually involves digging up the ground around the damaged section of sewer line. After repairs are made, earth is put back into the trench.

While this may seem to be relatively inexpensive, with costs starting between $7,500-$12,000, there are some other costs associated with a process like this. First, the damage that open trenching does to your landscaping can—in rare, more complex cases—be irreversible. This could lead to major expenses such as reconfiguring or even redesigning entire yards. Trenching can be less efficient in that it can take several days and more manpower; more time and more staffing = higher costs.

Sometimes special equipment has to be brought in for trenching (particularly on larger private or commercial properties) due to city requirements and other safety measures. Special equipment = higher expense and higher costs for the customer. Acquiring additional permits could also add to your repair total. 

Excavation

Traditional

After your problem has been properly diagnosed, it is time to start digging. This process is very costly if the main sewer line needs to be repaired. Many times the road, sidewalk and your yard and driveway are torn up to repair the actual problem.

Trenchless

No need for costly excavation equipment when just a few holes need to be dug to get to the pipes. Pipe lining only requires one hole, while pipe bursting may require three or more. Each of these can be dug by hand, saving a ton of money right at the start of the process.

Living Expenses

Traditional

Digging trenches in your house, yard and onto public property means your water supply is going to be shut off for the duration of the repair job. This can take anywhere from weeks to months. Your family is going to have to find another place to stay during this time, adding thousands of dollars to your total cost.

Trenchless

There is no need to leave your house at all during a trenchless repair. Your water gets shut off before work starts for the day, and is turned back on each night. This means no added costs for the homeowner.

Landscaping

Traditional

After all the repairs are done you are going to need to get your property back to normal. The contractors who dug up the road and sidewalks will be back to repair those. These costs are charged to your account. Then you are going to have to hire a landscape professional and someone to repair your driveway. These costs will run into the thousands.

Trenchless

Since there are only a few holes dug to accommodate the placement of the new pipes, there is not much extra cost for the repairs needed on your landscape. Filling these holes and replacing the grass or cement is something the homeowners can do themselves, saving thousands of dollars in the process.

Home Repairs

Traditional

If the plumbers had to come inside your home and dig a trench to replace old and damaged pipes, then the cost to repair this damage is going to cost upwards of $20,000. This includes remodeling a bathroom, replacing hard wood floors, replacing, relocating or reinstalling appliances and kitchen cabinets, and repairing walls and painting.

Trenchless

The damage from a trenchless install or repair is significantly less than a conventional repair. With only minimal holes to fill and repair, most homeowners find they can tackle these jobs with very little cash output.

Trenchless Sewer Repair Pros and Cons

Pro – Trenchless sewer line repair involves snaking a special camera through the shallowest point of your sewer line. Once your plumber identifies the blockage or damage, a new pipe made of resin is inserted to replace the damaged portion. Once this resin pipe cures, it becomes a permanent part of your line and your sewage system is ready to be used again.

Pro – A trenchless sewer repair job is usually completed within a day, which is one of the most significant advantages of this type of work. Besides minimal digging, there is little to no damage done to your property – another huge pro.

Pro – Trenchless sewer repair may be less expensive than the full cost of a traditional dig and additional cost of restoration. – resin pipes routinely last up to fifty years.

Con – The only drawback to trenchless sewer repair is that it is not always possible. Corrosion or old age can cause pipes to be unsalvageable, making a trenched sewer line repair the only option.

Trenched Sewer Repair Pros and Cons

If your existing pipes are unsalvageable, the traditional method of trenched sewer repair may be necessary. It’s imperative to consult with the experts before deciding on a course of action for your specific sewer line issue. The advantage of using the more traditional method is that even the most severe damage can be addressed thoroughly by digging into the ground. Full access makes it easier to identifying and fully address all issues. The cons can be quite overwhelming, however, since large trenches or holes will need to be dug on your property using heavy machinery and equipment, causing damage to your lawn and landscaping. It is a much more labor-intensive method as well, leading to much higher costs when you also factor in the cost of repairing the damage done to your yard and driveway.

A brief introduction to trenchless sewer repair

Trenchless sewer repair is a minimally-invasive method for fixing damaged sewer pipe that has been around since the 1970s. It was first developed in Europe and was initially used for municipal and industrial (i.e. large diameter) pipe projects.

However, it has advanced in the last 20 years or so and is now used to repair the small diameter pipes you find in single-family homes and high-rise buildings. Unlike old-school methods, trenchless sewer repair doesn’t require digging up lawns or ripping apart walls and in most cases, you’ll be able to stay in your home while the repair is going on.

It does require a construction permit though and a camera inspection before and after, to make sure that everything has been completed correctly.

Here are four of the most common types of trenchless sewer repair:

  • Structural Pipe Lining or Cured-In-Place-Pipe Lining (CIPP)
  • Spray Lining and Brush Coating
  • Pipe Bursting
  • Slip Lining

Can you use trenchless technology on a bellied line? Is it just putting a new line into the same problem? Does it need to be dug up and repaired?

Trenchless technology cannot be used on a bellied line because the sleeve will simply follow the existing pipe and end up with a belly. The line has to be dug up at the belly and repaired with a new section of pipe to correct the belly. There are other techniques for running a new line alongside the existing sewer line with directional boring or with a pneumatic gopher. Both of these technologies, however, might encounter problems with rocks or underground cables if they are in the path of the bore.