A Brief History Of Ants Farms

How to Get Rid of Ants

While there are wide range of do-it-yourself products available in the market to get rid of ants, an effective control requires a professional pest control service to manage the infestation and minimise recurrence. Our service technicians understand the habits of different types of ant and can offer discreet and targeted ant control

Identify Your Pest

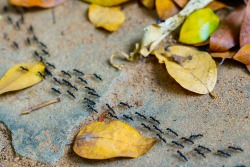
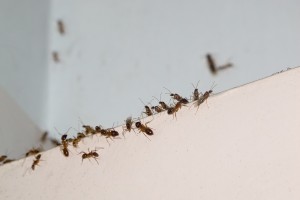
Have you put down food on the dining table and moments later only to find the food being attacked by a swarm of ants? If you have experienced this before, it is highly possible that your home or work place is infested with ants!

While the warning signs of an ant infestation are usually quite obvious such as with the presence of ants itself, ant trials and having ants found in food supplies, they are all easy-to-spot signs for home owners. With the presence of ants or ant nests, they are abe to grow in number over time, becoming a colony. The number of ant trials along different areas in the same kitchen could be seen increasingly more as they travel to and from their food source in an organised manner

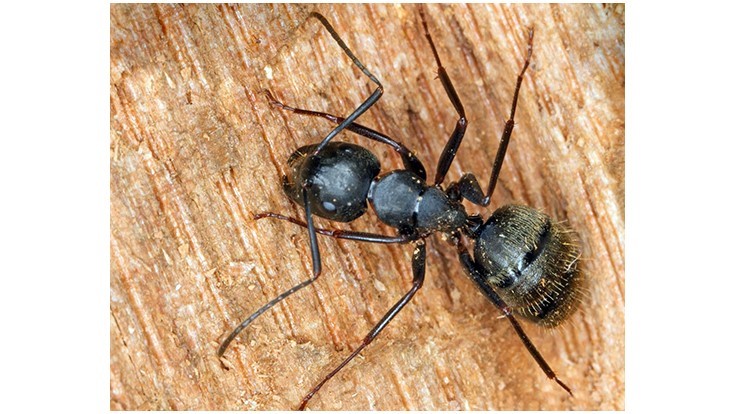
Ants are social insects living in colonies. Foraging ants come out in the early morning and early evening when the temperature outside is not very high. Food and water is key to the colony survival. Knowing the common ants species is important as you understand the biology and behaviour of certain species to carry out an effective ant control.

Choose Your Method

DIY or Professional?

When it comes to getting rid of ants, you have two basic options: DIY or hire a professional.

The DIY option requires the purchase of ant spray from your local home store. Insecticide spray is the most common ant control item for a household. The usage of an insecticide spray should work together with good sanitation. DIY spraying of insecticide may kill some foraging ants which happen to be out of the nest and disrupt the ant trials temporarily.

How to Choose an Ant Control Provider

Ants are incredibly annoying to deal with. You see one crawling in your kitchen, then you see another scurrying across your dining room table. At this point, you’re probably wondering how to keep ants away!

We’ll be the first to tell you that there are many ant control tips and tricks on the internet. Now, do they work? That’s up for debate, but the pest experts are committed to making sure your ant control issues are handled swiftly and safely.

Integrated Pest Management or IPM is an effective yet environmentally sensitive approach to pest control that uses a combination of common sense practices to remove pests, like ants, and prevent them from returning in the future.

Proven Ant Repellents & Deterrents

Certain species of ants require specific ant repellents and deterrents in order for the ant colony to be exterminated. Your pest specialist should be trained to identify ants and locate their colony so the source of your ant infestation will be targeted during our treatment process.

Proactive Ant Control

The most effective way to keep ants away from your home or business is with the help of the pro. Our preventative treatments are strategically applied throughout your property so you will get the most out of our professional pest control treatment.

Choosing the Proper Ant Bait

You arrive at a home to do a routine service and the customer lets you know they’ve been seeing ants inside. Depending on where you are located, the offending ants could be one of several to many different species. You’ll need to identify the ant because the type or species of ant will determine your approach to inspection and treatment.

Is the ant a soil- or wood-nesting ant or is it opportunistic in nest site selection? Is it a type that is polydomous (many nest sites) or polygynous (many queens)? Is it a species that will respond to baits well enough to affect control? Soil nesting ants will be found near ground level while wood-nesters typically associate with moist wood. Opportunistic species that are polydomous and polygynous are the most difficult ants to control due to the widespread nature of their infestations around structures

The fastest way to control ants is finding and treating the ant colony or colonies directly which with polydomous species is easier said than done. In most all cases, most of the infestation originates from outside with possible satellite colonies indoors. Even with Pharaoh ants which are primarily nesting indoors, a great deal of foraging is done on the outside of a building.

You’ve identified the ant involved and done your inspection. If you’re dealing with Pharaoh ants and maybe rover ants, you should head straight for the ant baits. For other types of ants, you should first attempt to find and treat the colonies involved and use ant baits as a supplement to treatment. If the colony has been difficult to locate or with a hard-to-solve case, then ant baits become the key tool to select.

Many times, ants may start feeding on a bait then, after a short time, begin ignoring the bait. Ant colonies also have different nutritional needs at different times of the year or by preference. For these reasons, it is a good practice to offer ants two or more different baits, including types of formulations to find out which the target ants prefer. For example,  you might offer a drop of 2 different gel baits and 1 or 2 different granular baits. Whichever the ants prefer, give them more of that bait.

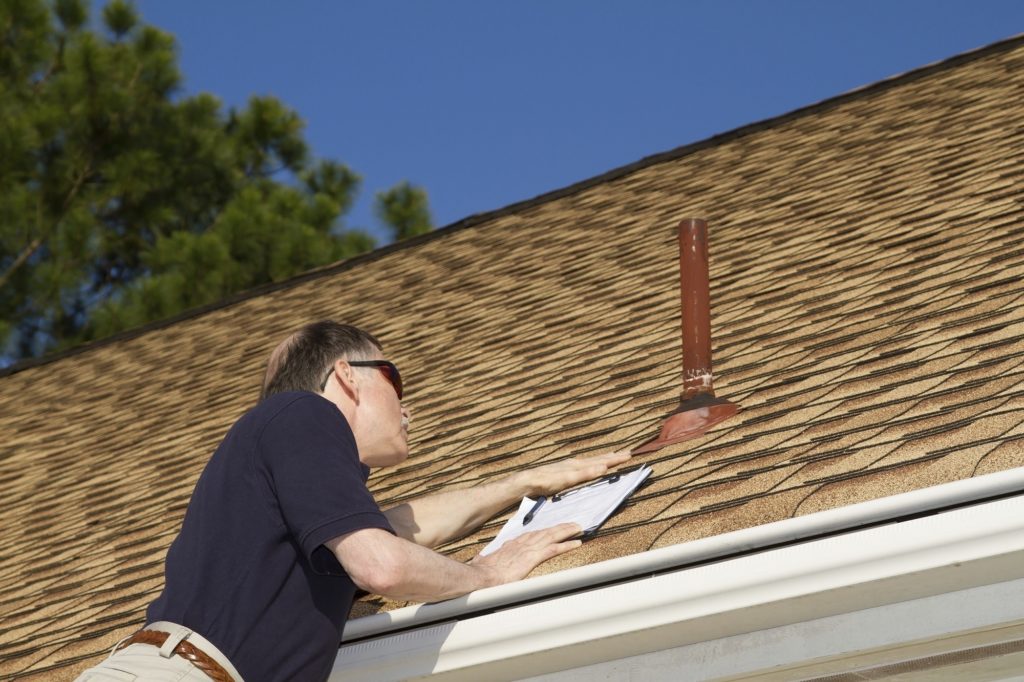
Preparing for Pest Ant Control Service

You’re seeing ants trailing across your kitchen floor or found them in droves in the bathroom. What can you do? There are a number of DIY options to get rid of ants, or you can choose to use a pest control service. If you opt for the latter, you’ll get the best results if you know what to expect from the service and you take some simple steps to get ready for the extermination. This will not only make it easier for the pest control pros to do their job, but it also will improve the chances of eliminating the ants entirely.

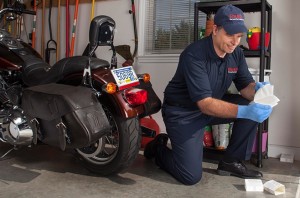
Professional Ant Control Services

Today’s professional pest control operators (PCOs) often use gel bait insecticides to control and eliminate small ants from homes. This requires the placement of small beads of gel bait, primarily in areas where ants have been seen feeding or trailing. The bait may be placed on small pieces of cardboard or another type of holder, or it may be contained inside an ant bait station.

Preparing for Ant Control Service

Prior to arriving at your home, PCOs typically provide you with a specific list of preparation steps for you to complete. The following steps are some of the most common requests or recommendations made by PCOs (you can take the same steps prior to using any over-the-counter pest control products yourself). Failing to prepare your home could make a treatment unsafe or lead to reinfestation of the entire home or building. For these reasons, many PCOs will not treat areas that are not prepared to their specifications.

After the Pest Control Service

Some common steps to be followed after an ant service has been performed (or if you are placing ant bait yourself):

Be patient. Because baits do not immediately kill the ants, it can take time for the results to be obvious. Rest assured that baiting is the best way to eliminate the entire nest of ants.

While the baits are taking effect, do not spray any insecticides or kill ants that you see, as they need to continue to feed to take the poison back to the colony.

Avoid using strong cleaners near the ant bait. This would eliminate the ant pheromone trail that the ants are using to find the bait.

Do not disturb ants that are heading to or away from the bait, or eating it. If ants are seen in areas where no bait has been placed, you can move a bait placement that the ants are not consuming over to this area.

Tips on Selecting Pest Control Services

Why Select Pest Control Services?

People vary in their tolerance for pests that periodically invade our homes and cause us some level of discomfort. The need for monthly, quarterly or yearly pest control services is a matter of your personal preference and your perception of what is (and is not) a problem. Ultimately, the decision on whether you need a routine pest control service is a matter of what you feel is needed to make your home a comfortable and relatively “pest-free” environment.

Although you may prefer a “do-it-yourself” approach to pest control, there are situations where the job is best left in the hands of a pest management professional (PMP). This is particularly true with wood-destroying insects such as termites, carpenter ants, and wood-boring beetles. Treatments for these pests can be complex and expensive, depending upon the size of the home, the type of construction, and the extent of the problem. We cannot endorse specific pest control companies, but we can offer some tips to help you reach an informed decision on the type of service you need or want. The emphasis here is on solving specific problems, particularly for wood-destroying pests, but the same general principles apply to regular service contracts for other common household pests, such as cockroaches and ants. Becoming an informed educated consumer is the best way to protect yourself and to make sure you get the kind of service you need and want. Here are some issues to consider when deciding what type of service you need or want.

There are three phases or types of licenses based on the type of work or pest involved:

P-phase – covers household pest control (cockroaches, ants, spiders, etc.) both indoors and outside. P-phase also includes vertebrates such as mice and rats.

W-phase – covers wood-destroying pests (such as termites, powderpost beetles, etc.) Individuals with W-phase licenses also perform WDIRs (the so-called “termite inspections” for residences being sold).

F-phase – covers pests in both the P and W phases, but it specifically involves the use of a fumigant. Please note that a fumigant is not the same thing as a fogger (“bug bomb”) that you can buy in many retail stores. Fumigation involves the use of special (and highly toxic) gasses that are released into structures that have been completely sealed or enclosed under a tarpaulin.

The removal/exclusion of vertebrate animals, such as snakes, raccoons and bats from houses is usually done by wildlife damage control agents (WDCAs). However, WDCA’s cannot apply pesticides (e.g, to get rid of fleas that may be the result of a raccoon or oppossum in the house). Many WDCAs work for pest control companies or they are licensed in structural pest control so they can perform any necessary insecticide treatments

all pest control companies must have at least one licensed individual (licensee) on their staff. The other employees work under that licensee’s supervision. Details about these categories can be found at the NCDA&CS website. License numbers have 3-4 digits followed by letters that designate which phases or types of pest control the company employees are allowed to perform. For example, a company (licensee) with a license number “9999PWF” is able to provide all phases pest control services. On the other hand, a company with the license number “9999P” can perform pest control for household pests (such as those mentioned above), but they cannot perform any treatments for termites or other wood-destroying pests, even if the treatments are applied indoors, rather than to the soil. Make sure that the company with whom you deal has a valid license issued by the NCDA&CS to provide the service you need. All employees of the company who sell pest control contracts or perform pest control services must have an identification cards issued by the NCDA&CS. This card will have their employer’s SPC license number on it. Under NCDA&CS rules, the company’s name or its SPC license number must be displayed on both sides of every service vehicle. Vehicles used strictly by company sales representatives are not required to carry these markings, although most companies do as a form of advertising). Whether or not the vehicle is marked, ask to see the person’s identification card as proof of his/her employment with an authorized pest control company. If he/she cannot produce a valid identification card, you should contact the NCDA&CS.

Break Away From The Stressful Journey Of An Event Planner

Ideas To Add Some Fun To A Serious Event

Unfortunately, there is still the widespread misconception that making business events more interesting and enjoyable damages their force, or that it’s a trick to appeal to the younger generations alone. Actually, using some of these ideas not only allows a wide and different audience to be more engaged, but also gives the event a touch of freshness. And the meeting will have more impact and will be remembered much longer.

Here are 12 ideas to have a little bit of fun even at the most serious events.

Cocktail show
If the chosen venue has a bar, you can hire professional bartenders who can perform striking stunts while mixing and creating great drinks. It’s a way to entertain those queueing at the bar and reduce boredom.

Mix your own drink
You can organize a stand where participants can propose or prepare their own drinks. Bartenders can supervise and offer tips and tricks.

Choose a theme
To create a fun atmosphere and get the users even more involved, you can suggest an event theme, which doesn’t necessarily have to be related to the business event. Themes require participation and a small creative effort, and facilitate the conversation. They can be as simple as the invitation to wear a certain color or article of clothing, or the attendees’ favorite team’s kit, or an item or symbol of their business.

Undercover entertainers
A visible stage isn’t the only place to offer entertainment; you can provide a more engaging experience by hiring performers who can blend in with the crowd and interact with it. The performances can be connected to the event theme and contribute to its storytelling, and you can use acrobats, clowns, or actors playing the part of historical characters or the event’s mascot.
Other ideas: call a comedian to make fun of the event, or organize a flash mob, either by secretly involving a group of participants beforehand, or by using professional undercover dancers.

Weird Staff
You can add another funny element to the meeting with singing waiters, historical characters welcoming the attendees, or bartenders pronouncing apparently unintelligible words that actually reveal clues to win a prize. Surprising and intriguing the audience always works, and it’s also cheap.

Drumming Display

Corporate percussion groups are geared toward corporate clients and can enhance your event theme. Specialist groups can perform using products i.e. recycled materials, ladders, machinery, etc. Drumming performances have wow factor, as they are fast paced, high energy and loud!

Laser Wizardry

LED and laser shows are the here and now of corporate entertainment. These seriously ‘in’ corporate shows can even incorporate logos that interact with audiences.

Robots

Walking, talking Robots are great for corporate events that include trade shows, exhibitions and conventions, or as great walk around acts to meet and greet guests. Some events are even using robots for things like mixing drinks.

Dance and Visual Performances
Video mapping dance groups are proving to be a big hit so far this year for corporate events. New technologies have allowed performers to take their dance and visual performances to the next level as humans and computers merge. These acts can incorporate specific music and graphics, as well as logos and corporate messages.

Stand Out, Make Your Events More Unique

Every event planner wants their work to stand out – that’s a given. It’s a crowded space these days, and we’re not just talking about event management – virtually every field is flooded with hopefuls due in large part to the advent of mass communication. Distinguishing one’s self requires true creativity, and if you sit back you’re going to be lost in a sea of noise.

Competitive, creative event planners can make their events more unique by paying attention to a few core areas, and tweaking things just a bit, just enough to be seen as going against the grain.  There is always risk in stepping outside the comfort zone, but if you’re the event planner that gets it right, you may start seeing the jobs roll in.

Focus On A New Angle

Do homework on the industry you’re event is promoting, and understand all the topics currently being discussed at other industry events. Can you find an emerging perspective that will draw a thought-leader crowd? Better yet, are you able to present fresh topics that none of your competitors seem to have touched on that your guests would be interested in hearing about?

Tip: certain event management companies establish themselves as “thought leaders” in one field. This generally takes time and total emersion in a particular field, but pays off making them the go-to team for all things related to said-field.

Get Creative With Your Venue

Don’t just book out another conference hall and call it a day – that’s boring. It’s what pretty much everyone’s doing for their events. While you may not want to break the bank on deco, consider ditching the conference hall for something a bit more memorable; a bit more ‘out there.’ A lakeside cabin, a rustic farmhouse, a bowling ally, a cruise liner; these locations may not be typically used for corporate meet-ups, but who says they can’t be.

Hint: don’t forget what you require of a venue, but view the possibilities of a unique space with an open mind. A kick-ass space may meet all your needs, and more.

Hire An Up-And-Coming Guest Speaker

Celebrity isn’t always what an event needs. Ask around within an industry for someone new on the scene whose making waves, getting published, starting cool projects, and being written about. A few lesser-known speakers or experts who may be more eager to speak could offer some adrenaline at the perfect moment. Often that new speaker provides a new perspective even a seasoned expert cannot.

Tip: a lesser-known keynote is more likely to self-promote the engagement and in turn, your event.

Things To Know Before Booking Entertainment For Your Event

In theory, booking entertainment for an event should be a breeze: identify the entertainer, make an offer, then sign the contract. But in practice, there’s a lot more that goes into booking entertainment, and some of the things you might not consider can potentially mean the difference between successfully booking entertainment and scrambling to find someone to fill the slot.

Know How To Reach Out

The first step towards booking entertainment for your event is to identify the entertainer you want at the event. The kind of entertainment you book should depend on the kind of event you’re running; there’s no quicker way to throw away money on entertainment than by booking someone who isn’t a good fit for your event’s guests. In order to make the most of your booking (and get your money’s worth), make sure the entertainment you hire is a good match for your guests.

Have A Plan Of Action

When it comes to booking entertainment for events, your next step should be to figure out what that entertainment will look like. After all, you wouldn’t open a restaurant without putting together a menu first, right?

The Entertainer’s Fee ≠ What You’ll Spend

So you’ve reached out to an entertainer and they’ve accepted your offer — you can go ahead and cross the entertainment off your to-do list, right?

Wrong.

One of the most common errors event planners make is in assuming that the performance fee for the entertainer is all they’ll have to spend on entertainment. In reality, the entertainer’s fee is just one part of the overall cost of entertainment, and if you don’t plan accordingly, you might find yourself going over-budget in a heartbeat.

Know How To Negotiate

Once you’ve gotten in touch with the entertainer, don’t be afraid to (effectively) negotiate the booking fee — just because you’re quoted a particular fee doesn’t mean you should pay it. Being willing to negotiate on the fee can save you a lot of up-front costs, but with any negotiation, though, you have to know when to push and when to ease off. If you don’t, you risk ensuring the entertainer will never consider working with you again.

How To Promote An Event

By now, this event management cycle should be familiar to you:

  1. Planning the event: From idea to action plan.
  2. Organising the event: From action plan to execution.
  3. Promoting the event: Spreading the word and selling tickets.
  4. Hosting the event: Making sure things run smoothly on the day.
  5. After the event: Thank yous and follow ups.

Facts About Trenchless Pipe Replace Bursting Technology

Trenchless Sewer Line Repair Vs (Traditional) Sewer Repair

Trenchless Sewer Repair

The trenchless method used at Pipe Spy (pipe bursting) usually involves digging two access pits on either side of the length of a project’s sewer line—one entry pit and one exit pit where the new pipe is pulled through the existing pipe using a bursting head, breaking the old clay or cast iron away and leaving the old pipe in the ground. What is left is the new, longer lasting pipeline.

Trenchless technology was created to be more cost-efficient; these processes take less time and can often (at most single-family private residences) be executed by crews of four or five persons. Because there is less digging on a trenchless worksite on the whole, there is less chance of disruption to property landscapes and other underground utilities, making it a safer option.

The trenchless method we use at Pipe Spy is more eco-friendly and leaves a smaller carbon footprint because in its execution we use less energy, less manpower, and fewer materials; we use HDPE lines that often last 25-50 years longer than the average materials used to replace sewers. These lines are also less susceptible to environmental damage like corrosion and tree roots.

Open Trench (Traditional) Sewer Repair

The traditional method or open trench method usually involves digging up the ground around the damaged section of sewer line. After repairs are made, earth is put back into the trench.

While this may seem to be relatively inexpensive, with costs starting between $7,500-$12,000, there are some other costs associated with a process like this. First, the damage that open trenching does to your landscaping can—in rare, more complex cases—be irreversible. This could lead to major expenses such as reconfiguring or even redesigning entire yards. Trenching can be less efficient in that it can take several days and more manpower; more time and more staffing = higher costs.

Sometimes special equipment has to be brought in for trenching (particularly on larger private or commercial properties) due to city requirements and other safety measures. Special equipment = higher expense and higher costs for the customer. Acquiring additional permits could also add to your repair total. 

Excavation

Traditional

After your problem has been properly diagnosed, it is time to start digging. This process is very costly if the main sewer line needs to be repaired. Many times the road, sidewalk and your yard and driveway are torn up to repair the actual problem.

Trenchless

No need for costly excavation equipment when just a few holes need to be dug to get to the pipes. Pipe lining only requires one hole, while pipe bursting may require three or more. Each of these can be dug by hand, saving a ton of money right at the start of the process.

Living Expenses

Traditional

Digging trenches in your house, yard and onto public property means your water supply is going to be shut off for the duration of the repair job. This can take anywhere from weeks to months. Your family is going to have to find another place to stay during this time, adding thousands of dollars to your total cost.

Trenchless

There is no need to leave your house at all during a trenchless repair. Your water gets shut off before work starts for the day, and is turned back on each night. This means no added costs for the homeowner.

Landscaping

Traditional

After all the repairs are done you are going to need to get your property back to normal. The contractors who dug up the road and sidewalks will be back to repair those. These costs are charged to your account. Then you are going to have to hire a landscape professional and someone to repair your driveway. These costs will run into the thousands.

Trenchless

Since there are only a few holes dug to accommodate the placement of the new pipes, there is not much extra cost for the repairs needed on your landscape. Filling these holes and replacing the grass or cement is something the homeowners can do themselves, saving thousands of dollars in the process.

Home Repairs

Traditional

If the plumbers had to come inside your home and dig a trench to replace old and damaged pipes, then the cost to repair this damage is going to cost upwards of $20,000. This includes remodeling a bathroom, replacing hard wood floors, replacing, relocating or reinstalling appliances and kitchen cabinets, and repairing walls and painting.

Trenchless

The damage from a trenchless install or repair is significantly less than a conventional repair. With only minimal holes to fill and repair, most homeowners find they can tackle these jobs with very little cash output.

Trenchless Sewer Repair Pros and Cons

Pro – Trenchless sewer line repair involves snaking a special camera through the shallowest point of your sewer line. Once your plumber identifies the blockage or damage, a new pipe made of resin is inserted to replace the damaged portion. Once this resin pipe cures, it becomes a permanent part of your line and your sewage system is ready to be used again.

Pro – A trenchless sewer repair job is usually completed within a day, which is one of the most significant advantages of this type of work. Besides minimal digging, there is little to no damage done to your property – another huge pro.

Pro – Trenchless sewer repair may be less expensive than the full cost of a traditional dig and additional cost of restoration. – resin pipes routinely last up to fifty years.

Con – The only drawback to trenchless sewer repair is that it is not always possible. Corrosion or old age can cause pipes to be unsalvageable, making a trenched sewer line repair the only option.

Trenched Sewer Repair Pros and Cons

If your existing pipes are unsalvageable, the traditional method of trenched sewer repair may be necessary. It’s imperative to consult with the experts before deciding on a course of action for your specific sewer line issue. The advantage of using the more traditional method is that even the most severe damage can be addressed thoroughly by digging into the ground. Full access makes it easier to identifying and fully address all issues. The cons can be quite overwhelming, however, since large trenches or holes will need to be dug on your property using heavy machinery and equipment, causing damage to your lawn and landscaping. It is a much more labor-intensive method as well, leading to much higher costs when you also factor in the cost of repairing the damage done to your yard and driveway.

A brief introduction to trenchless sewer repair

Trenchless sewer repair is a minimally-invasive method for fixing damaged sewer pipe that has been around since the 1970s. It was first developed in Europe and was initially used for municipal and industrial (i.e. large diameter) pipe projects.

However, it has advanced in the last 20 years or so and is now used to repair the small diameter pipes you find in single-family homes and high-rise buildings. Unlike old-school methods, trenchless sewer repair doesn’t require digging up lawns or ripping apart walls and in most cases, you’ll be able to stay in your home while the repair is going on.

It does require a construction permit though and a camera inspection before and after, to make sure that everything has been completed correctly.

Here are four of the most common types of trenchless sewer repair:

  • Structural Pipe Lining or Cured-In-Place-Pipe Lining (CIPP)
  • Spray Lining and Brush Coating
  • Pipe Bursting
  • Slip Lining

Can you use trenchless technology on a bellied line? Is it just putting a new line into the same problem? Does it need to be dug up and repaired?

Trenchless technology cannot be used on a bellied line because the sleeve will simply follow the existing pipe and end up with a belly. The line has to be dug up at the belly and repaired with a new section of pipe to correct the belly. There are other techniques for running a new line alongside the existing sewer line with directional boring or with a pneumatic gopher. Both of these technologies, however, might encounter problems with rocks or underground cables if they are in the path of the bore.

Unloading Services The Tasks

HOW TO UNLOAD A VAN SAFELY

CHOOSE YOUR UNLOADING ZONE WITH CARE

People can often rush to unload a van, more so than when loading, which is a particularly dangerous practice if you do so in an unsuitable environment. Unload your van in an area free from traffic or other obstructions so you can take your time and not have to worry about causing an inconvenience to others. Choose a flat surface, or place brake chocks under the wheels to secure the van if on an incline.

BEWARE OF ITEMS THAT HAVE MOVED

It’s inevitable that some items will have moved about during the journey. Even if everything appears fine, approach with caution as you may find items have unbalanced themselves and are likely to fall. It’s also good practice to keep an eye out for any broken glass or splinters from damaged items that can cause harm to your hands and feet as you try to unload. Wearing gloves is good practice.  

KNOW WHERE YOU’RE UNLOADING

If you begin unloading items without knowing their final destination, you’ll likely cause an obstruction and only end up moving them twice. Equally, it’s not always feasible to move items directly to where they’ll end up. If you’re moving into a new home, for example, you might decide to unload all your furniture into an open garden space before deciding what goes where.

Loading and Unloading a Van Safely: Our Tips

If you’re running a one-person delivery business, you’ll spend a lot of your time taking things in and out of the back of your vehicle. If the items you’re delivering are cumbersome or heavy, this can spell trouble – and thus it’s worth thinking about best loading and lifting practice.

Start with the Big Stuff

To use your space as efficiently as possible, get large items like fridges loaded first. It’s a lot easier to find space for a small item than it is to cram large ones in at the end. Add to this the fact that your larger items are likely to be heavier than your small ones, and therefore capable of inflicting crushing damage, and the sense of starting with the big stuff becomes obvious.

Spread the Load

Obviously, you don’t want your van to be unbalanced. As such, avoid stacking everything on one side of the van. Push everything right to the rear, and secure small items beneath seats to prevent them from flying around when you go over a speed bump. To be sure that you’re not overloading your van, learn its maximum loading capacity, and figure out a rough idea of when you’re approaching it.

Secure the Load

The interior of your van should provide anchoring points, to which you’ll be able to attach straps. Use these to keep your goods fixed into position. This step is especially worthwhile if you’re transporting fragile goods. Replacement straps are inexpensive, so invest in them before your old ones snap.

Choose the Right Area

Ideally, you’ll want to unload your cargo onto a flat surface that’s out of the way of traffic. Unfortunately, this isn’t always possible. Since we don’t get to pick our cargo’s destination, it’s worth taking a few measures to limit the risk. If you’re unloading onto an incline, put brake chocks beneath the wheels. If items look as though they’ve moved during transit, treat them with special caution, as they’re the most likely to move again when you start to unload them.

The process of loading/unloading a vehicle

Organizing

Before packing the vehicle make sure to gather all the materials so that you don’t have to face any problem regarding space. In order to gather the materials, you may require special instruments such as a dolly, padding furniture, tape for packing, straps and shrink wrap etc.

Step 1: Toolkit

Remember to keep a toolkit close by for taking apart and reassembling the furniture.

Step 2: Separation of items

Keep the important stuff you will need immediately on your person and not in the truck.

Step 3: Special care for fragile items

It would be more appropriate if the fragile items are kept separately.

Step 4: Disassembling furniture

To protect your furniture you have to disassemble it. This will help you secure it as much as possible, e.g.

  • Take out the cushions from the sofas.
  • Disassemble your bed
  • Take out the bulbs from the lamps
  • Remove the drawers from the dressers (It will be easier to lift them)
  • Collect all the screws in sandwich backs and label them so that you don’t have to worry about which screw is to be fixed in which item.
  • IMAPORTANT: Disassemble all IKEA furniture and wrap them in moving pads as necessary. Due to the materials used to build the furniture it is very fragile and may break while moving it.

Step 5: Placement of Furniture

After you are done with the disassembling, bring all the furniture in front of the truck. This will help in adjusting it in the truck in a proper, organized way.

Unloading a Truck

A Truck loaded with proper planning and care will take any worries out of an Unloading job. There are a few things which need to be considered while unloading a fully loaded removals truck.

  • Be very carefully when you open the rear gates of the truck because momentum can make the transit boxes press on to the gates and can easily fall over you.
  • Position the truck for unloading close to the entrance, and make sure there are no tripping hazard.
  • Clear the pathway to the house and open main doors.
  • If the boxes are marked properly, they can be painlessly moved to the appropriat

Vehicle Loading and Unloading: Keeping Your Workers Safe

For many businesses, loading and unloading trucks is a daily activity. This activity also comes with a higher risk of employees getting injured on the job. Loading and unloading motor vehicles is one of the most common causes of workplace injuries in the manufacturing, distribution and courier industries. From forklift accidents to falling materials, employees in these industries must be focused and aware at all times to prevent serious injuries. This article will provide valuable tips businesses and employees can implement right away to keep workers safe during vehicle loading and unloading.

Most Common Injuries

Loading and unloading cargo are activities which heighten the chance of workplace injuries. Some of the most common workplace injuries related to vehicle loading and unloading include:

  • Sprains and strains from improper lifting or handling of cargo
  • Crushing injuries caused by colliding with a forklift, truck, falls from loading docks, or falling stacked materials
  • Bruises and cuts
  • Spinal injuries from improper loading, unloading, falls or being crushed
  • Head trauma from falling cargo

These injuries can range from minor to serious, showing how important it is for businesses to set the proper standards for how employees should be loading and unloading. Injured workers create financial and operational challenges for businesses. Keeping employees safe, aware, and engaged while at work will help cut down on the risk of injuries related to vehicle loading and unloading.

Three Types Of Home Builder

How to Choose the Right Home Builder

Selecting the right home building firm for your needs and for the type of new home you seek is one of the most important decisions you’ll make in your home buying process. Fortunately, there are some proven ways to speed up the research and selection process and to help ensure that you find a quality builder who’s a good match to construct your new home

Define Your Needs

While some builders construct a broad range of homes, many builders also specialize in a specific type of home, price range, or style. For example, not many firms build starter homes for first-time buyers and also multi-million dollar homes for affluent custom home buyers. The building materials, trade contractors and even the building process itself can differ greatly by type and price of home. Look for a fit here. Then, be ready to make sacrifices, as it isn’t always easy finding a home that meets all the criteria to be your dream home. In fact, a 2016 report from Bank of America found that 95 percent of first-time buyers are already willing to make sacrifices in order to make homeownership a reality.

Experience Counts

Every home building firm (including the most experienced and well-regarded companies today) once built their first home. And many new home building firms were started by experienced veterans of other builders. Don’t overly discount a new firm – especially if their team includes seasoned pros – but do look for strong experience overall and in the type of home you seek.

Are Past Homebuyers Satisfied?

Many builders offer customer references and referrals. If not, ask. And in either case, follow up. A few great questions to ask: Would you buy another home from this builder? Or recommend them to close friends or family? And don’t forget to ask for the key reasons why a past home buyer would or would not recommend a builder.

Is the Builder Licensed and Insured?

Not every state or area requires builders to be licensed, but make sure that you work with a licensed builder in such areas. Ask about the insurance that the builder and his or her trade contractors carry. Make sure that they and you are covered during the building process.

Tips for Choosing and Working With a Builder

You may have heard horror stories about problems with builders, budgets spiraling out of control and sites left half-finished. But the reality is that the vast majority of builders are both professional and capable, and you can do a great deal to avoid bad experiences simply through the way you choose, manage and communicate with them. Here’s why it’s worth laying the foundations for a good relationship with your builder — and how to do it well.

Don’t approach a builder too soon. It may seem logical if you’re thinking of having construction work done to start by approaching a builder, but don’t be too hasty. Builders are generally good at pricing once they know exactly what’s wanted, but asking for a price before you have any drawings or detailed information about the project is as good as inviting them to tell you simply what they think you want to hear.

Consider the scope of the project. Find the right kind of building company for your project. The kind of contractor suitable for a luxury retail project has to be highly organized, usually with multiple managers, a well-organized back office, and teams that can operate around the clock and produce exceptionally high-quality work at speed. Such contractors tend to be expensive and for most people would be too much for a kitchen addition or an attic conversion.

Establish whether you need a specialist or just a general builder. A really good general builder is suitable unless the work in question is unusual. For example, a good general builder is perfectly capable of converting an attic or building out a basement. You can, of course, go to a loft or basement company, and they, too, may do a great job. The most important thing is to find someone who will do good work for the right price

Aim for one point of responsibility. Rather than using one general contractor, it may seem wise to try to save money by directly engaging separate tradespeople, such as plasterers, electricians and carpenters.

How to Choose the Right Custom Builder for You

Congratulations! You’re taking the first steps toward building your own custom home. You’ve probably been thinking about your dream home for quite a while. Maybe even spent a few late nights perusing Houzz to get ideas. You may have already chosen the perfect lot or sketched out ideas for a floor plan. Wherever you are in this research phase, we are thrilled that you’ve found us. We make it our mission to provide as many helpful resources to people like you who are embarking upon this exciting custom homebuilding journey.

In this post, we hope to make an incredibly important decision a little less daunting for you. Selecting the right custom homebuilder is absolutely the most impactful decision you will make along the road to your dream home. Choose well and you will have a true partner and advocate. With the right builder you will avoid the all-too-familiar construction horror story and instead end up with a high-quality dream home as well as an enjoyable, smooth, and creatively fulfilling experience for you and your family.

When to choose your builder

The best time to choose your builder is either before you begin the design phase with an architect or very soon after engaging an architect. Bringing a builder on board early in the design phase will ensure that your home’s design and your desired budget stay aligned throughout the process. Actually, a good custom builder will do much more than that during this architectural design phase

Beginning your search

First, you should know that in the state of Texas anyone can be a builder. There are no licenses or certifications required by law here like there are in most other states. Because of this very low barrier to entry, there are hundreds of homebuilders in and around Houston, some better than others.

Dig deep in your research

Now for the fun part. Time to narrow down your list to your top two or three choices. You will want to do this by digging deep with online research AND by reaching out to them through their website or by phone.

most important factors when choosing a builder for your new home

Price and budget

There are specialist builders for first-time buyer homes, mid-range project homes, top-end custom designs, and for the very high budget there are luxury builders.

Reputation and references

Many clients want the perceived security of a household name, with the company’s volume of completed homes guiding their choice. It is very important to read reviews and speak to past or current clients before you sign. A good builder will have no issue with letting you speak to customers and they should be able to supply good, verifiable references.

Financial stability

In today’s highly competitive market, builders are cutting prices to keep busy. That looks good on paper, but cut prices are not sustainable in the long term because every business needs to make money to remain stable into the future.

Home style and preferences

Many builders specialise in certain styles. If you are building a complicated, undercroft three-storey home, don’t choose a small-project home builder who specialises in single-storey display homes. They probably won’t have the staff or trades to move onto a complex construction.

Location

Most builders have a favourite area where their pricing is most competitive, so it’s wise to choose a builder that has a good sample of homes built in your proposed area.

How to choose the right builder for you

When you decide to build your next home, rather than buy it, there’s one thing you simply have to get right: choosing the builder.

Picking the right builder has the potential to make or break the entire experience for you, so it’s something you don’t want to rush.

Check their folio

You’ve no doubt got some idea about the type and style of home you’re hoping to build, so it’s important to find a builder whose skills best align with your plans. Paxino says this part of the process is usually easy, as most builders will have their projects displayed on their websites, or they will be able to provide you with a catalogue of homes they’ve built previously.

Find or ask for references

Some of the best information to assist you in selecting your builder can be gleaned by speaking to people who’ve dealt with them before. “You might be skeptical about who they’re going suggest – whether it’s their brother or someone they know,” Paxino says.

Go the extra mile

You’re going to be paying your builder hundreds of thousands – possibly millions – of dollars to construct your home, so a few hours spent doing some extra reconnaissance will be more than worth your while. There’s nothing to stop you knocking on the door of people whose homes have been built by your prospective builder and asking for their opinion. There’s every chance this will be the best and most honest information you’ll receive.

Let’s talk costs

There’s no point in gathering building quotes first, Paxino says, because many of the builders may not be appropriate for your project. So do your research first, narrow the field, and only then start asking for prices from the builders who’ve made your cut. And remember: cheapest isn’t always best

DJs Then And DJs Now

How to Choose a DJ

While I do take requests from coworkers, the song choices usually fall on me.  I’ve learned that starting a Monday off with too much emotional rock can easily set the wrong tone – and only the funkiest of jams can be played to liven up Friday afternoons. That’s why I give credit to the real DJs.

Song choice and order are pivotal to one’s surroundings, especially at a party, club, or on a radio station.  Careful attention to the mix of songs played and how they blend together is an impressive skill. If you have visited our DJ page, then you’ve noticed how many different options you have when it comes to hiring this type of entertainment.  GigMasters features Club DJs, Emcees, House DJs, Karaoke Performers, Latin DJs, Mobile DJs, Party DJs, Radio DJs, and Wedding DJs

Having trouble understanding the differences among them? Here’s a quick guide:

Club DJs – Think: “I just want to dance.”  Club DJs will be playing the most popular songs mixed with dance beats to keep the energy up.

Emcee – Worried about how to move guests along from a cocktail hour to the wedding reception, or when to give speeches to the newlyweds?  A Master of Ceremonies is practiced in making announcements, and a DJ with a magnetic personality.

House DJs – Picture fist pumping and electronic beats.  House music is multicolored, non-stop dance music.

Karaoke “KJs” – DJs who offer Karaoke are a great addition to any celebration.  Bars and restaurants should offer guests the chance to sing “Paradise By the Dashboard Light” at least once a week.

Latin DJs – These DJs will have the widest selection of Salsa, Merengue, and Reggaeton music.

Mobile DJs – Self-sufficient and able to provide all of their own equipment.  These types of DJs are great for events at all types of venues, even outdoors.

Party DJs – The goal is to make the party a success.  These DJs know what songs are best, from slow dancing to group dancing.

Radio DJs – If by some chance Delilah isn’t syndicated in your area, you can find these on-air personalities to play music and communicate with listeners.

Wedding DJs – Liven up a reception with the songs that you want to hear.  A professional Wedding DJ will be sure to set the mood with the music you choose for this special day

How to Choose Between DJs

A reader writes:

“Awesome article on choosing between a band and a DJ.  My fiancée and I decided the DJ route is the way to go for us, but now it’s my job to pick the most kick ass DJ St. Louis has to offer. Do you have any tips on choosing between different DJs.  Oh, and none of them will let you attend a function they are putting on, disrespectful to the clients (or something like that).

You found some good news. Do you really want to attend random functions of random people you don’t know, just to hear the random DJ? I mean, yes, that would be helpful for your decision, and yes, we (half-heartedly) recommend doing just that. But trust us–you dodged a bullet. It’s sort of like if you go on a beach vacation and “forget” your jogging shoes. Oh no, you can’t go jogging, you have to sleep in, instead. Damn.

Plenty of experts suggest that you get technical. They instruct you to ask your DJs about his sub-woofers, about the specs of his lighting system, etc.  Screw that. You’re not really going to know what you’re talking about, and he’ll secretly laugh at you

Ask other friends who have recently gotten married. Ask your other vendors.  Hell, as geeky as this sounds, even ask your co-workers. If all that yields nothing, you’re stuck doing things the old-fashioned way: google.

And we know, we know, it’s a crapshoot. When we just googled Best St. Louis wedding DJs, we got 87 pages of shot-in-the-dark, standalone businesses. A better option: check out sites like OneWed.com or MyWedding.com, which aggregate vendors and provide user reviews.  In this case, there’s something to the wisdom of crowds. Call me lazy, but if I see one vendor who has 17 user reviews with an average of 4.7, and they charge the same as the dude with only 1 rating (2 stars), well, that’s not exactly an agonizing decision. Why over-think it, right?

How to Pick a Band or DJ for Your Wedding

Picking the right sound and mix of entertainment on your wedding day will not only help set the tone but also ensure your guests have a night to remember. Here, a few of the industry’s top music experts share their advice on how to pick a wedding musician or DJ and what to ask before you make a decision

Match Your Band To Your Style

“When choosing a band, ask for their song list and make sure that they specialize in the genres that you like best. Find out their policy about taking specific song requests and what their approach is to making announcements to make sure it fits in with your style. You can also ask about what the performers wear, and if you can have input so that the band aesthetic matches the overall tone for your wedding.”—Valerie Romanoff, CEO, Starlight Orchestras

Pick A Genre

“Know what type of music you like and what kind of experience you want your guests to have. A great band will create a vibe for the night based on what you desire.”—Marianne Bennett, CEO, Element Music

Pay Attention to the Band Leader

“Always ensure the band has a very experienced emcee or band leader that is a part of the band. This person is the communicator for the wedding coordinator to the guests. Nothing is worse than someone who is choppy and does not have flow.”—Jordan Payne, CEO/Wedding Planner & Designer, Jordan Payne EventsBand: Jordan Kahn Band

Look for Passion

“I really love having true musicians for weddings—working with a talented performer who might DJ on the weekends for extra cash, or a bluegrass trio who loves random small gig. It’s fun to bring in artists who are passionate about what they do.”—Jaclyn Journey, Owner/Designer, Jaclyn Journey Event & Floral Design

Key Steps To Picking The Perfect Wedding DJ.

Now your wedding is around the corner, it slowly dawns, that the show must be perfect. Nothing should be compromised. Having checked all other boxes like venue, outfit, flowers, it’s time to let the music play to the high heavens. Music is one of the intricate fibres that make up a near perfect wedding. Guests may easily forget that the dessert didn’t get to their corner of the hall but will not as easily forget how the music you played made them feel. Music and entertainment are very important in determining what kind of memory the guests will leave with.

While the most important part of the day is the exchange of vows between two lovebirds, music comes next quite closely. Interestingly, statistics show that about 72% of brides say they wished they had spent more time carefully choosing their music vendors. 65% of couples that chose a band to entertain at their wedding, said, if they had to do it all over again, they would have chosen a disc jockey.

The back and forth that go on in the minds of couples, on whether or not to use a band or DJ is worthy of note. Both have a lot of good to offer when got right, however, you can’t afford to risk anything, especially the entertainment at your wedding. Sad as it may sound, you just can’t hide bad music, so it behooves you to get it right. A lot of working DJ’s are part-time hobbyists who do it just for fun. You’ll want to get a professional to man that stand to avoid sad stories. How then do you check that box perfectly?

Investigate- Take your time to search them out. Go out to some events and get the contacts of the DJ’s behind the parties you enjoyed. Ask friends and family to recommend a few and then create a list. Carry out some level of research on those on your list. What equipment are they using? What attitude do they exude when on duty? Read reviews and then decide who to pursue.

Stand your ground- You may have picked out a DJ, now be sure to communicate exactly what you want. Some DJ’s may want to side-track you and have their own way, don’t let them. Make him listen to you and your demands. If that’s such a hard thing for him to do, it’s time to change DJ’s.

How to Choose Your Wedding DJ

It’s time to add another key player to your supplier squad! You may have chosen your wedding’s key songs, but now you’re going to need to hire someone to play them. Your wedding DJ will be responsible for making sure the energy stays up from dawn ‘til dusk (and probably long after), so you’ll want to find one with awesome emcee skills and a killer tracklist.

Sort out the important stuff

Step one is taking the time to write out any wedding details that may affect your decision. Knowing things like your venue size, venue style, budge and wedding theme will help you figure out exactly what you’re looking for in a DJ. You should also note the genres of music you love, your favourite artists and your most played songs – those will come in handy when you start interviewing potential candidates.

Do your research

Now it’s time to do a little bit of homework (it may not sound fun, but it is!). Scroll through our wedding supplier listings, check out Instagram and ask your recently married friends and/or relatives for recommendations – you’re sure to find a handful of amazing options by the time you’re finished. Pay close attention to their reviews and ratings – comments from couples who have used their services in the past are super insightful.

Get in touch

Once you’ve selected your faves, start reaching out. If you’re using WeddingWire, simply click the blue “Request more information” button at the top of a listing and it’ll connect you right away. If you’re using another method, reaching out via their website or through email is your best bet (no sliding into DMs – Those are easy to miss!). Remember to ask key questions like, “are you available on my wedding date?”, “what is your rate?” and “can I see a copy of your standard contract?”. If you’re satisfied with their answers, book a meeting with them IRL or schedule a Skype call.

Sample their work

When you’re meeting with your candidates, you’ll want to do a deeper dive into their work. Yes, you’ve probably already sampled a playlist or two, but at this stage you’ll want to get a bit more. Ask your potential DJs about their music repertoire and give them a bit of insight into the types of songs you love. You’ll also want to let them know exactly what you’ll be needing music and emceeing for (i.e. the ceremony, the reception, dinner, the after party). This will help them customize a tracklist just for your event.

Its All About Cockroaches

How to get rid of roaches naturally

When you see roaches in your house, your first thought might be to grab a bottle of insecticide or to call an exterminator. But not only would you be exposing your family to toxic chemicals, they might not do much good.

Because cockroaches are becoming so close to invincibility, researchers suggest combining chemical treatments with other methods — like traps and better sanitation — when fighting a roach problem. Or you can forego chemicals and try just natural methods.

Getting rid of roaches naturally can be a slow process. But getting rid of them naturally can also prevent the problem from reoccurring. So how do you do it?

Clean, Clean, and Clean Again

As with most household pests, an ounce of prevention is worth a pound of cure. What do I mean? You’ve got to make sure your house is spic-and-span, because cockroaches are attracted to food residue, particularly grease. That means wiping down the counters each night, never leaving dirty dishes in the sink, making sure the stovetop is clean and sweeping the floors before you go to bed. This may seem like a lot to do every day, but if you start doing this stuff on a regular basis, a 15-minute cleanup should be plenty at the end of each night to eliminate most residues (unless you have a party — or kids — and then cleanup will take a little longer).

Seal Up Cracks and Holes

That means inside your pantry, between the countertop and the wall, and in the baseboards. Roaches (and other insects) can crawl through even the smallest of spaces, so it’s important to seal the entries into your home. This may take time, but in the end, it’s worth the effort, especially if you live in an apartment and have neighbors who don’t maintain the same standards of cleanliness as you do. You can use a tube of caulk and a caulking gun to do the job.

Cut cockroaches off from their food supply.

Start by cleaning spilled or leftover food. A forgotten cereal box in the back of the cabinet is a gold mine for roaches. Don’t leave any dishes on the counter or in the sink either Go deeper — literally — by checking behind cabinets and appliances too. “They like behind the refrigerator because that’s a nice, warm environment,” Nobody cleans behind their refrigerator so there’s usually a food source for them back there. Store your garbage in a bin with a tight-fitting lid and take it out regularly,  Treat the bottom of the trail pail with the same level of care by wiping out any residue, gunk, or leftover food.

Eliminate any and all hiding places.

In addition to food, roaches need harborage to thrive. Their favorite nooks and crannies include stacks of paper and cardboard boxes, so recycle any materials you have laying around. Cleaning up any clutter will deter roaches from hanging around — or coming back.

Leave out roach bait — but don’t spray.

While sanitation and housekeeping is key, you can also employ some other tools in your war on roaches. Baits are the ideal option for homeowners to use, because they’re simple to apply. You do not want to spray a pesticide in large areas because it may contaminate surfaces that you do not want contaminated: countertops, appliances, etc. Baits, including Combat Roach Killing Bait, are a cleaner and less risky way to control the problem.

Use baking soda to kill roaches

Baking soda is one of the most multifunctional products ever created, so it’s no surprise that it has the ability to get rid of cockroaches, as well. The best method is if you mix the soda with some sugar, first. The smell of sugar will bring out the roaches, tempting them to eat from the mixture, without noticing the baking soda. After that, when they go to drink some water, a reaction with the soda will cause their stomach to burst. Cockroaches often feed on their dead comrades, so a chain reaction of death will follow.

Here is how to proceed:

  1. Mix equal parts of sugar and baking soda in a lid or a dish.
  2. Place another dish or a lid close to the first one and fill it with water.
  3. Refill the containers with more bait and water when the dead roaches start to appear.
  4. Place a couple more dishes around the places, where roaches usually gather.
  5. Repeat until you are cockroach free.

Getting rid of cockroaches by using catnip

Almost anyone who has cats also has catnip. And even if you don’t have, you can easily purchase it. It’s one of the most effective home remedies against cockroaches and it’s really easy to use.

  1. Boil around 1l of water.
  2. Place the catnip in the water and let it boil for around 10 minutes
  3. Turn off the heat and let the solution cool down.
  4. Put it in a spray bottle and apply it all over your property.

What Smells Repel Cockroaches?

Nature has blessed the cockroach with an incredible sense of smell, making it easy for them to seek out food and find a mate. But that same sense of smell can be used to get rid of cockroaches – there are some scents that cockroaches simply cannot abide. Here are some smells that cockroaches find disagreeable, and you can use those smells to send them packing.

Lavender

Cockroaches hate the smell of lavender, and that is good news for you. If you love to grow lavender in your yard and garden, you are more than halfway to a roach-free home. Just plant lavender around your home as a sort of defense system – you will create a barrier that even the most determined roaches will be loathe to cross. You can use lavender oil inside your home to chase existing roaches away and stop new ones from coming in. Lavender essential oils work well for this purpose; you can dilute the oil and place it in a spray bottle, then spray surfaces where cockroaches have been a problem.

Citrus

You may love the smell of fresh citrus, but cockroaches hate the scent. That means you can use citrus scented cleaners in your kitchen and bathroom to chase any lingering roaches away.You can also keep a few citrus peels around your home in strategic places. The cockroaches in the area will smell that fresh citrus and know to stay away. You may need to refresh the scent a couple times a month, but that is a small price to pay for a roach-free home.

Eucalyptus

Koala bears may love the smell, and the taste of eucalyptus, but cockroaches find it quite disagreeable. If you have been looking for an excuse to plant a eucalyptus bush in your front yard or spray your home with fresh eucalyptus oil, consider this your opening. You can use the eucalyptus scent in a number of different ways, from essential oils diluted with water and sprayed as a barrier around your home to plantings in your front yard and garden. Just use your imagination – and use the cockroach’s keen sense of smell as a pest fighting weapon.

Sometimes a natural approach to pest control is the best choice, and that is certainly true with cockroaches. These common pests choose their targets carefully, so do what you can to make your home the least attractive choice.

How to Kill Roaches and Their Eggs

Short on time? Here’s the quick answer to killing roaches and eggs.

  1. Kill adult & juvenile roaches with Advion roach bait gel & boric acid. Alternatively, you can use a contact killing pesticide like DemonWP insead of baits and boric acid.
  2. Make sure juveniles can’t reproduce and eggs can’t hatch with Gentrol, an insect growth regulator. IGRs will make roach eggs sterile. It will also stop juveniles from being able to reach adult-hood.
  3. Don’t attract more roaches. Remove food sources, keep the house clean, and close off openings and entrance points. Making sure more roaches don’t come in means you don’t fight a never ending battle

Roof Inspection Safety Tips

Buying a New Home? A Roof Inspection Will Save You Money

Buying a new home is a huge life decision. Prospective buyers know they need to make sure their new dream home has a sound foundation and safe electrical wiring, but inspecting the roof is often overlooked. This is surprising, considering how integral roofs are to protecting a home, and how expensive a new roof can be.

According to the National Roof Certification and Inspection Association, roof deficiencies are the most common problem reported by home inspectors. But as we’ll explain, you won’t want to rely on just the home inspection. A certified Roof Inspector will be much more thorough and will be able to warn you about major upcoming expenses.

First Impressions: Inspecting the Roof Yourself

You can start to get an idea of the condition of a roof from the moment you go to view a potential home. Look for damaged or missing shingles on the roof, dry rot, and the condition of the gutters. Can you see moss growing on the roof? Is the roof sagging on one side?

When you can spot major problems from the ground, then you know there are likely to be costly repairs needed in the new future. If you know you won’t have the capital to buy the home and repair or even replace the roof, then you’ll know right off the bat that this home is not for you, before you spend money on a home inspection and roof certification.

How Much Will This Cost?

We know you’ll be wanting to save your pennies when you’re just about to shell out a lot of money on a new home, so you are probably wondering how much this will cost you. The average cost for a roof inspection is $650 and the average cost of a home inspection is between $500 to $700.

What to Expect During a Roof Inspection

The importance of your home’s roof really can’t be overstated. Without a solid, functioning roof, a house quickly turns into an uncomfortable place to live—not something any homeowner wants to endure. To protect your investment and your health, prioritize keeping your home’s roof in good shape.

How do you do that?

Well, as is the case with your home’s other systems, preventative maintenance is key. If they’re caught early, problems such as failed flashing, missing or torn shingles, and broken tiles are easier to fix and less likely to have already caused major problems to the structure or interior of the house.

Do I Need a Roof Inspection?

There are four main reasons you might need to have your roof looked at by a professional, says Louis. If your answer to any of the following questions is “yes,” a roof inspection needs to be in your future

Roof leaks and ceiling stains

In most homes, roof leaks aren’t quite as dramatic as they’re sometimes portrayed on television and in movies. Instead of racing around your house placing buckets and coffee cans under streams of water coming from the ceiling, it’s far more likely that you’ll begin to notice dark stains slowly spreading across the ceiling.

Purchasing a new home

If you’ve gone through the house-buying process before, you know how nerve-wracking the inspection and appraisal process can be. A home inspection is very important, but if there are major issues with one of the home’s systems—including the roof—consulting an expert is the smartest course of action

Buying a Home? Here’s Your Roof Inspection Guide

You’re investing hundreds of thousands into a pre-owned home and the last thing you want to find post purchase is a costly problem—especially in the roof.

Before the Offer: Look for Signs of Water Infiltration

To better shape your offer right out of the gate, look for potential roof problems the first time you see the house.

Whether it’s an open house or private showing, there are a number of things you can look for:

Water stains on ceiling — These are a dead giveaway of a leak in the roof.

Fresh ceiling paint — While not always a sign of a roof leak, it could be a sign that someone has tried to paint over water stains.

Curled shingles — If the home has asphalt shingles or cedar shakes, look for curling at the edges. This is a sign that the shingles are near the end of their usable life.

Missing shingles and tiles — Red alert: if shingles or tiles have been missing for a while, the roof may have water damage.

Water stains under the roof — Peak in the attic and look around for signs of water infiltration.

Water damaged fascia boards — Look for cracks and discoloration in the fascia boards around the roof. This can be a sign of an old roof.

With flat roofs or shingle roofs, it’s easy to spot potential problems since they’re more obvious. But tile roofs can look fine and dandy from the outside while hiding some serious problems—like a deteriorated felt underlayment. Protecting the roof from water, the underlayment deteriorates over time and needs replacing every 12-20 years. Ask the seller when’s the last time they had the underlayment replaced. If they start sweating profusely, you may need to reevaluate your offer

The answer: Yes, if the general inspector asks for it.

Home inspectors know enough to point out potential problems. But they’re not roofing experts. So when they see something that could be a sign of a bigger roof problem, they’ll usually recommend a separate roof inspection.

Roof Inspections – Are They Necessary?

In many states, especially those that see a higher amount of snow and hail, when buying a home it is usually requisite to have the roof certified from inspection. Matter of fact, many lenders required this to be done before they will cut a check. In most states, a properly ventilated roof can last 20 years or more. In states where the snow is heavy, they often have to be replaced every five years. While having a secure roof is one of the most important parts of a home, it can also be a very expensive investment, especially if you bought a home under the guise that everything was on the up and up.

Roofing Inspections

Roof inspections are simply inspections that determine the integrity of a roof, how long it may last, and when it will need to be replaced. Roof inspectors are not going to climb up on your roof or the roof of a home you are thinking of buying and pull up shingles or tiles. Roof inspectors have special procedures wherein they can determine the lifespan of a given roof without tearing into it. At first glance it might seem that roofing inspectors would have to pull up part of the roof to do a thorough examination, but if you consider your own roof, you would not want anyone tearing holes in it just to see if it was in good shape.

Are Roof Inspectors Different From Home Inspectors?

Roof inspectors also have super-technical techniques like infrared roof inspections where they don’t even have to touch the surface of the roof itself to determine a roof’s integrity. This process uses infrared rays to locate parts of a roof that are at higher or lower temperatures than the rest of the roof. These “hot spots” can show a roof inspector just exactly where heat is escaping

Play it Safe

Because replacing a roof can be quite an investment, insurance companies and lenders require that this has been checked off. It makes sense for these companies to protect their investments, but you as the homeowner should want this to be secured as well. You don’t want to be stuck with a bill that you weren’t expecting, and you also don’t want to sell a home to a family and put them in the same spot.

Roof inspections are not all that expensive, and these roofing inspections can give you and your lenders and insurance carriers peace of mind. Because when the rain is coming down or there is a foot of snow weighing down your roof, you want to sleep comfortably knowing that you are secure from above.

HOW TO INSPECT YOUR ROOF

WHAT TO LOOK FOR AND WHEN TO CALL A PROFESSIONAL

Too many of us take our roofs for granted — it’s not something we think about unless there’s a problem. But as your home’s first line of defense against the elements, your roof goes through a lot of wear and tear, so it’s important to do a yearly visual inspection as part of your home maintenance routine. By giving your roof a brief inspection, small problems won’t lead to giant catastrophes.

WHAT TO LOOK FOR

Inspecting your roof does not mean walking on the roof. Roof walking is dangerous and best left to the professional. So first things first, stay off the roof!

From the safety of the ground or through a window, perform a visual inspection of the roof with binoculars. Remember: A roof is designed to age over time. Even a one-year-old roof will look different than a roof that was just installed. But by inspecting your roof regularly, you can spot changes and potential problems.

Look for shingles that are missing or loose, or show signs of heavy wear or degradation (bald spots, granule loss, or severe curling), as these are considered weak points where water can penetrate and cause leaks. While it is normal for asphalt shingles to experience some curling, significant or abnormal curling are indicators that your shingles are reaching the end of their useful life.

GETTING A CLOSER LOOK

After a preliminary inspection from the ground a closer look may be necessary. Safely climb a ladder to get a closer look at your roof. But stay off the roof itself — not only is it dangerous to walk on the roof, you can potentially do more damage to the shingles.

How Weather Influences Exterior Painting

Easy Tips for Choosing Your Exterior Paint Palette

Unlike interior colors, exterior hues can affect the entire street — and that puts a lot of pressure on homeowners when it comes to choosing a palette. In addition, a number of factors come into play that you don’t have to deal with on the inside of a house: landscaping, hardscaping, roofing and more.

Plan Around the Elements That Are Hardest to Change

Unless you’re doing a complete renovation, surfaces such as roof shingles or tiles, stonework, pathways and driveways will remain in place. Take these into consideration as you select exterior colors

Consider Your Home’s Architectural Style and Era

Whether you have a Queen Anne Victorian, a Craftsman bungalow or a midcentury modern ranch, your exterior paint scheme should feel appropriate to the style. Imagine a classic Federal-style home painted burnt orange, or a New England saltbox in pale mint green. Jarring, right?

Think About the Visual Effect You Want

Mull over your home’s relationship to the street and the landscape. Does it sit back from the road or amid a cluster of large, towering trees? You might choose a slightly lighter or brighter color so that it stands out. Conversely, a darker hue can make it appear to recede.

Choose Several Paint Shades

Essentially, an exterior scheme has three major parts: field color, which dominates; accent color, which brings doors, shutters and other smaller areas to life; and trim color, used for window and door casings, roof edging, railings and other trim.

How to Choose Exterior Paint Colors Using a Visualizer

Exterior paint colors can make all the difference when it comes to your home’s curb appeal, especially if you’re trying to sell. The color of the exterior of your house is the most public design decision you will ever make. Given the fact that it will add value and beauty to your home, outdoor paint color plays an essential role in how potential buyers will perceive your house. But with thousands of exterior paint colors available, it can be a daunting task to choose the right one. Which is the best one for your home? And how many layers of paint do you need to get the required durability? Technology to the rescue!

The Basics of Choosing Colors

Before you begin choosing the right house color, start out with helpful resources. With a home color visualizing tool, it’s important to get the basics right. For instance, consider the size of your home when planning on painting its exterior. The size can influence whether dark or light colors are more appropriate. As a general rule of thumb, light colors will make your house appear larger and will be more affected by different light conditions, whereas dark shades can make your property appear smaller and help it blend with the surroundings.

Look to a Color Visualizer Before Buying Paint

Once you get the basic idea of what you want for the exterior of your home, you can use a color visualizer to find that perfect color. You can browse by popular colors, color families, or decorator picks. Many major paint companies offer this tool with exterior options including McCormick Paints, Sherwin-Williams, and Benjamin Moore. While the specific interface for each paint tool is a little different, all use similar methods to allow browsers to test various paint options. Simply by uploading exterior photos of your home, you can see what different paint colors might look like on your walls. It is a great way to virtually experiment and gets ideas and inspiration for your home’s color scheme.

Confirm Your Color Choices With Paint Samples

Now that you have narrowed your choices using a virtual tool, it’s time to confirm them with color samples in your staged home. While visualizers are helpful, there is no substitute for seeing the color on the walls of your home in real life. Buy test sizes of the paint colors you are considering and put some brush-outs on the outside. Make sure to put some color on both the south and north sides of your home as lighting there can differ dramatically. Also, visit these areas at different times of the day to get a fair idea of how the finished product will look

Don’t Limit Your Color Choices

Ideally, an exterior scheme should have three major parts: A field color that dominates; an accent color that brings shutters, doors, and other smaller parts to life; and the trim color. Once you have chosen an appealing combination of field and trim, make it stand out with an eye-catching accent color. Feel free to go bold, but don’t go overboard.

Tips for Choosing Exterior Paint Colors for Your House

Picking house paint colors isn’t just difficult; it can be terrifying! If you choose colors that are boring and blah, your house will seem flat and featureless, but if the paint colors are too bold, they can overwhelm the architecture or might even infuriate the neighbors. The potential rewards are substantial, though. Getting it just right by choosing the perfect exterior house color and trim combinations can change your life.

As you consider paint colors for you home’s exterior, keep in mind that the best paint colors are those that highlight the most beautiful features of your home. That’s one reason to know a little bit about residential architecture since history can tell you a lot about what colors have worked for various house styles over the years. Also remember that skillful use of color can sometimes disguise design flaws, boosting the curb appeal and market value of your home.

Tips for Choosing Exterior Paint Colors

How do you find that magic color combination? Professional designers suggest 12 specific techniques. And please note that no expert ever suggests buying a paint color because it’s on sale or because your painting contractor can get you a deal!

Honor History

If you’re planning to paint an older home, you’ll probably want to use a historically accurate color scheme. One way to do this is by a simple form of archeology—you can hire a pro to dig down to old paint layers on your siding and trim to analyze them and recreate the original color of your house. Or, you can refer to a historic color chart and select shades that were common at the time your home was built

Consider Jazzing Up the Past

In some neighborhoods, it’s common for homeowners to fly in the face of history. Instead of choosing historically accurate colors, they paint with modern colors to dramatize architectural details. Using bright colors on old architectural details can produce startling and exciting results—if your local historic commission approves. But before you buy 10 gallons of bubblegum pink, it’s a good idea to look at what your neighbors are doing. A fluorescent colored Victorian that looks splendid in San Francisco can seem wildly out of place in more conservative neighborhoods of the Northeast. The bright pink stucco that is common in Florida might truly startle neighbors in Washington State—which can be either good or bad. Remember that what’s deemed as an acceptable color scheme may be dictated by region and neighborhood, not just historic architectural style.

How to Select Exterior Paint Colors for a Home

If you’re painting the outside of your home, don’t be afraid to take a little time with the color decision. “Your interior is about your personal color tastes,” says Tom Lee, Senior VP of Consumer Marketing for Behr, “but the exterior is really about durability. It’s about protecting the biggest investment you have.” It isn’t an easy decision to redo, so don’t rush it.

Plan to spend a little more money. Investing in a premium paint such as Behr Marquee Exterior Paint & Primer in One is a wise choice. You don’t want to be climbing up a scaffold again anytime soon — or paying for someone else to do it — so paint needs to cover well, resist stains and stand up to weather.

Think about your permanent materials. If you have an existing brick or stone foundation, patio, or accents, work with their underlying tones as you’re choosing a paint shade. If you’re stuck, try pairing opposites in terms of color temperature. For example, if you have a warm red brick foundation and you want brown for your exterior paint, choose a taupe with cool gray/blue undertones instead of a peachy tan.

Take advantage of technology. You can usually bring in a sample of permanent materials to the paint store for computer color matching. Behr also offers an online tool called that lets you choose an initial color, recommends matching/coordinating colors, and helps you experiment with color combos on images of a home exterior so you can imagine the finished look.

Don’t forget the trim. If you want something other than the usual white, try your exterior color just a few shades lighter for a subtle, elegant effect.

How to Choose the Right Exterior Paint Colors

Are you struggling with choosing the right exterior paint color for your home? I’m here to help and walk you through each step for choosing the right paint color combination for the exterior of your home.  I’m going to make this real easy for you guys, I promise!

The number one paint question I have received over the years is about choosing exterior paint colors because it’s one of the most difficult paint decisions you can make for your home.    You want your home to have beautiful curb appeal and you don’t want to make any color mistakes. If you follow my seven steps below, I promise you will avoid the common mistakes and will be able to make exterior paint color decisions that will be beautiful! Stick with me on this!

CHOOSE YOUR SHADE FIRST

The first thing you will want to do when deciding what color you want to paint the exterior of your home is to choose the shade of a color first. When I say “shade”, I mean do you want a light, mid-tone or dark color on the body of your home? At this point, you don’t have to consider anything else except to make a decision if you want a light or white color, a mid-tone or medium shade, or do you want a dark color.

For most of you, choosing a shade is an instant easy decision and you immediately know that you want a light or dark colored home.  However, some of you may not be sure and are open to any shade and need a little help making that decision. It will help if you search Pinterest for exterior homes for inspiration to determine what shade would look best for your home. For example, if you have a ranch style home, search “ranch style home exteriors” in Pinterest search to see all the different color options to inspire you.

CONSIDER YOUR ROOF COLOR (AND OTHER ACCENT COLORS)

Before you can go much further in your color decision-making, you will need to consider the color of your roof.  If you have a black or neutral gray, you don’t have to worry as much about color clashing. Unfortunately, I have a dark brown roof with slight red undertones, so colors like shades of green or blues wouldn’t work for me and would clash.  For those of you that have a roof with red, tan, green or blue gray undertones in your shingles, you will for sure need to factor in your roof color as you choose your exterior paint color palette.

An Electrical Contractor Talks About Electrical Wiring

Choosing the Right Electrical Wire

We’ve all done it. Walk into a building supply store and head for the electrical department to buy some electrical wire for a project that we have at home. In most cases, we have no idea what one type of wire is from the other. Even more, we couldn’t tell the difference from 100-amp wiring and 200-amp wire, let alone the difference between 20-amp and 30-amp wiring. This simple set of facts is enough to make my hair stand up on the back of my neck, fearing the dangers of having an electrical fire at some point.

Maybe it’s just to extend a circuit for an additional outlet or two, or maybe it’s an underground feed to a swimming pool you just added? In any case, the point is that now you’re at the store looking at the wire, which one is the right wire for you? What size wire do I need? Is color important?

Not only are there different types of wiring, both indoor and outdoor wiring, but also underground wiring and specific types, like heat resistant and corrosion-proof wiring. If that isn’t enough to distinguish the differences, there is also copper and aluminum wiring. Each has its own unique wire sizes and ampacity-carrying capabilities.

Although aluminum wiring was used in the past, today’s homes use copper wiring. Aluminum wiring often heated up under load, causing it to become loose in the connections and sometimes caused electrical fires. Those connections already in homes may work forever untouched and not overloaded, but I would advise an electrical upgrade by replacing the wiring to copper.

Wire coloring makes the wires look pretty, right? Well maybe, but the real reason for wire colors is to identify them for their intended uses. The green wire is used for grounding, always! In the past, and I’ve personally seen this while working on an old school project. The “hot” wires, feeding branch circuits, were actually green in color. I was taken aback! Everything I had been taught about wire colors was now a red flag, and caution was the word working on the circuitry.

How to Choose the right electrical wire?

Whenever you shop for electrical wire, you will see that there are numbers of types and sizes from which you have to choose from. So different types of wire are made for different uses, but with any of these wire types knowing the right wire sizes or gauge, is key to making the right choices. Wire gauge refers to the physical size of the wire, rated with numerical designation that runs opposite to the diameter of the conductors . In other words, the smaller the wire gauge number, the larger the wire diameter.

Stranded vs. Solid Wire

One more thing to keep in mind is to select the style of wire that best fits your needs. Some wire is stranded, while other wire consists of a solid copper conductor. In installations using metal conduit, the solid wire doesn’t always pull as easily if the conduit has a large number of bends. But solid wire is usually easier to secure under screw terminals, such as those found on standard switches and receptacles.

Why wire gauge is important?

Incase of overloading wire and overheating them, circuit breakers or fuses gives good protection but they are not much reliable and not  a foolproof protection. Both circuit breakers and fuse are designed to sense current loads to “trip” or “blow” before the wires can overheat up to the danger point.

There is the potential for danger anytime a device or appliance tries to draw more power on a circuit than the wire gauge is rated for. For example, plugging a heater rated for 22 amps into a 16-amp circuit wired with 1.50 sq. mm wire poses a distinct danger.

QUICK TIPS FOR SELECTING THE RIGHT ELECTRICAL WIRE & CABLE | TPC

Can you think of at least one area where you’re replacing electrical wires and cables often? What happens when this cable fails? Unplanned downtime? You’re too busy for that

Why is it failing? Is there a lot of flexing or tension on this particular wire? Is the area known to occasional, or frequent impact? Does your cable come into contact with chemicals or exposure to extreme temperatures?

When choosing the right cable for your problem area, you must first ask yourself why the cable is failing and how often it disrupts production? If your answer is often, it’s time to look for a longer-lasting product. As experts in the industry, we can help you find the right solution for your failing cable.

Here are four tips to consider when choosing the right electrical wires and cables with the most life and reliability for your needs:

If the area you have in mind is experiencing frequent flexing or tension, you’ll want a cable that is finely stranded and has a high durometer like our Trex-Onics C-Flex product.

If you’re looking for a cable that might need to be protected from impact, like getting hit or run over, you’ll want to consider a cable with a thick, reinforced jacket. Our Super-Trex portable cord is lined with 100% fabric serve. Don’t like yellow? They come in black, too.

Do you have harsh chemicals in your plant? You’ll likely want to explore our Chem-Gard 200 TC Rated cable, solution with a specially compounded fluoropolymer jacket and conductor insulation.

If you have extreme temperatures — hot or cold, you’ll want to visit our Thermo-Trex 850, a high-temperature electrical wire for your environment.

Electrical Wire and Cable Buying Guide

First, understand the difference between wire and cable:

A wire is one conductor that carries an electrical current through a circuit.

A cable is a collection of wires sheathed together.

The majority of conductors are copper, which is corrosion resistant and works as a better conductor than aluminum. Aluminum serves as a less expensive and lightweight alternative.

The American Wire Gauge (AWG) system provides the sizing of wires. The higher the number of the gauge, the smaller the size of the wires. The National Electrical Code (NEC) mandates the regulations for wires and cables that can be used for electrical applications.

How to Identify Wires and Cables

Each jacket will have information printed on it to help you choose the correct product for your job. A letter code provides the attributes of the wire, along with material, gauge and voltage rating.

Naming and Taxonomy

The NEC provides a system with letters to quickly identify what a wire’s capabilities are. Some common lettering for wire includes THHN, XHHW, THW, etc.

Skilled Electrician And Electrical Services

Whether you are planning to install a new wiring system in your property or replace the existing one, it’s vital you approach an experienced electrician. They are well aware of the fact that electricity is one of the delicate issues homeowners have to deal with on a daily basis and so they need to install high-quality wiring systems. The wires should be grouped and arranged in such a way which helps in proper distribution of electricity.

With numerous experienced electricians scattered all over Reigate, choosing the best among them is indeed a daunting task. The best you can do if to meet them in person and ask what all they consider before choosing the ideal wiring system for your property. It is vital for the wiring system to be clear as a faulty arrangement can lead to disaster.

Safety

The wires should be specially designed with a focus on protecting the people living on the property where it is being installed. This is because everyone’s safety is the most vital factor to consider. Unless the wires are designed and installed by an experienced electrician, the electrical equipment connected with the wire might also get destroyed. Unless conduit wiring is installed, the risk of causing physical damage to your property through fire hazards and electrocution remains.

Load

The load a wire can carry is generally dependent on its design and specifications. A skilled electrician will make sure that the certain level of voltage load the wiring can handle is not exceeded. The load a wiring can carry is directly related to the diameter of the wire. In other words, the wider the diameter of the wire, the more load it can carry

Durability

Since overheating will not only destroy the wiring but also lead to hazardous accidents, it is a must that you prevent the issue. Even when electric currents are made to pass through the wiring at maximum level, it should not overheat. Electricians enhance the durability of the product by choosing the right cable material, sheathing, and wire material. It should not also be exposed to chemicals, moisture, harsh weather or fumes for a longer period of time.